
After test driving the new brakes I installed I quickly realised that the handling of my Z3 was severley lacking. With this in mind I set about looking for options. Eventually I settlet on a Spax SVX Adjustable set up which comprises of Coil overs for the front and a more traditional spring and damper set up for the rears.
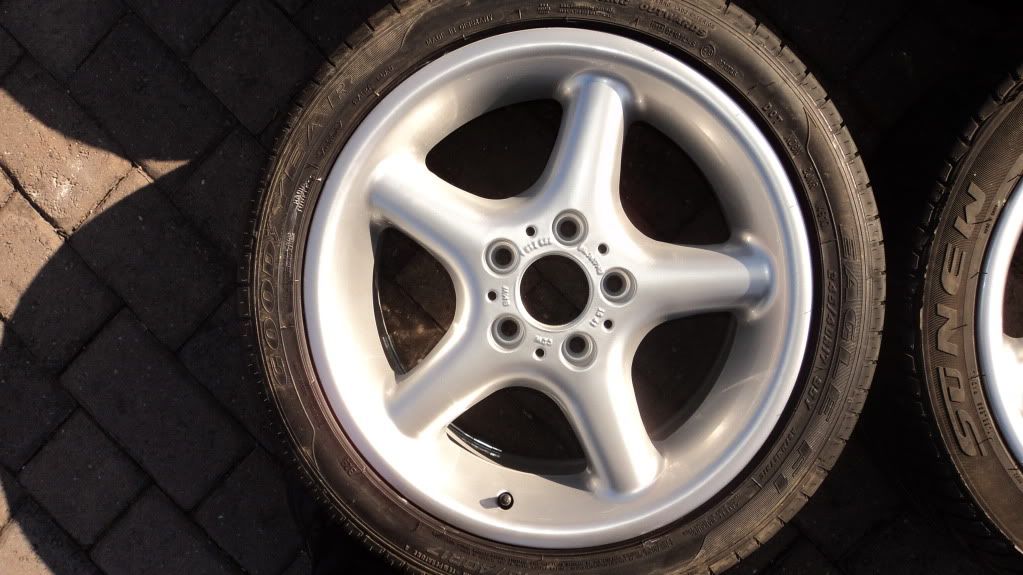
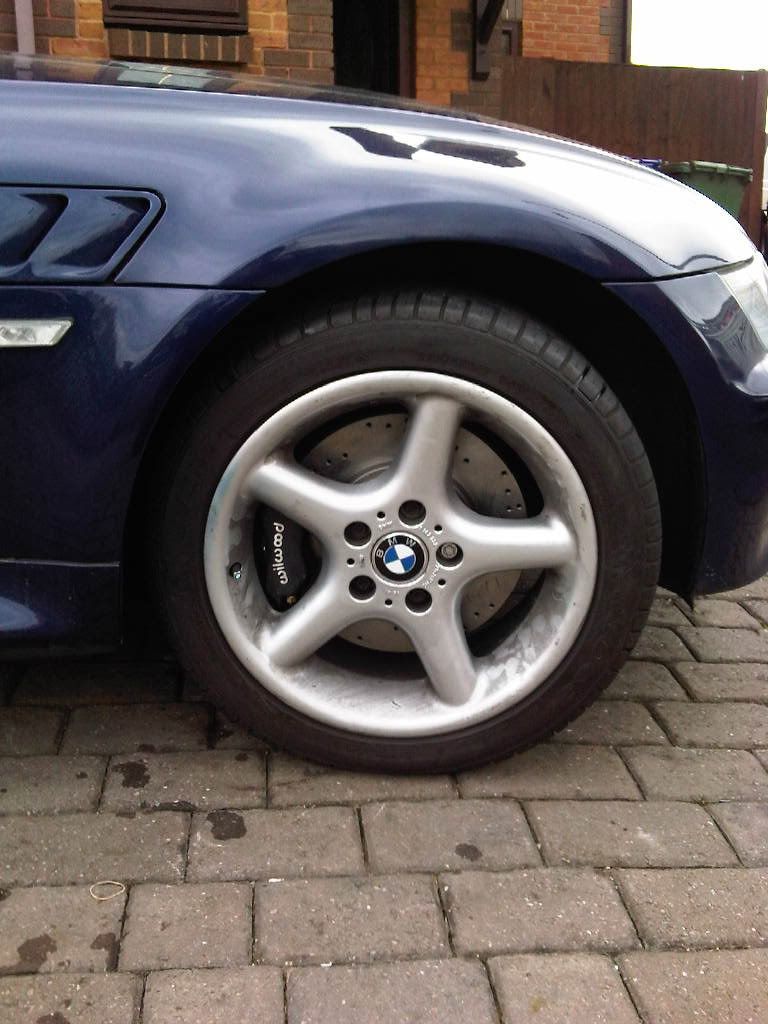
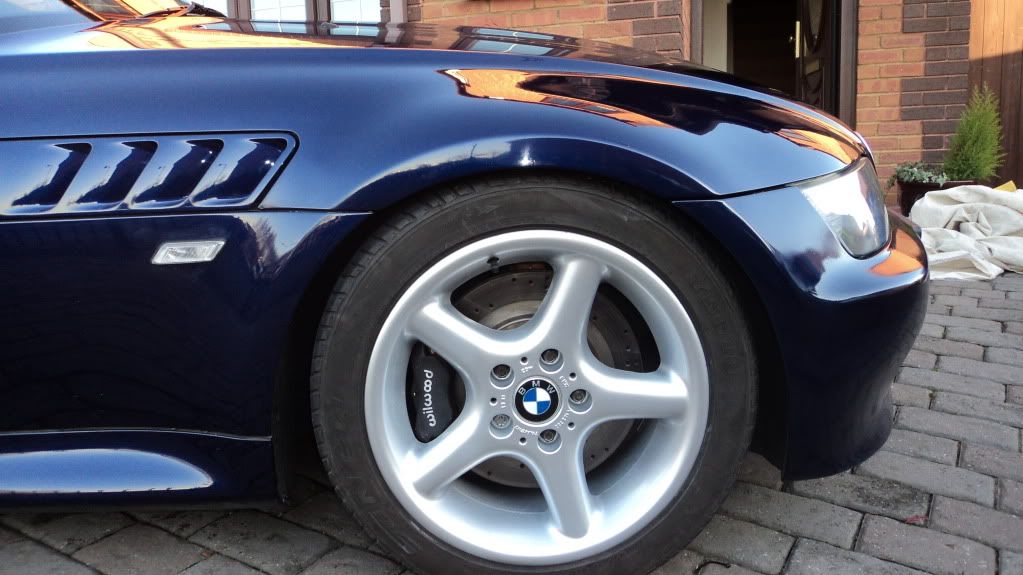
While the wheels were off of the car I took them to canvey Island to be refurbished and to replace the rear tyres with 245/40/17 Good year F1`s.
The wheels were really well sorted at only £50.00 per corner including tyre fitting and balacing( the tyres cost slightly more). Here is the link of who I used http://www.essexalloywheelrefurbishment.co.uk
Freshly refurbished alloys
<a href="http://s1091.photobucket.com/albums/i39 ... els002.jpg" target="_blank"><img src="http://i1091.photobucket.com/albums/i39 ... els002.jpg" border="0" alt="wheel"></a>
<a href="http://s1091.photobucket.com/albums/i39 ... els002.jpg" target="_blank"><img src="http://i1091.photobucket.com/albums/i39 ... els002.jpg" border="0" alt="wheel"></a>
The process of replacing a suspension is not so difficuilt you will need some additional tools over and above your socket set however.
You will need:
A really good trolley jack that is low enough to get under the motor after it is lowered.
Four axel stands.
A set of coil spring compressors.
My alignment and camber I do not do myself as I do not have the laser alignment equipment.
Simply you start by lifting the car onto its axel stands removing the wheels and unbolting the old units from the hub and from the strut tops.
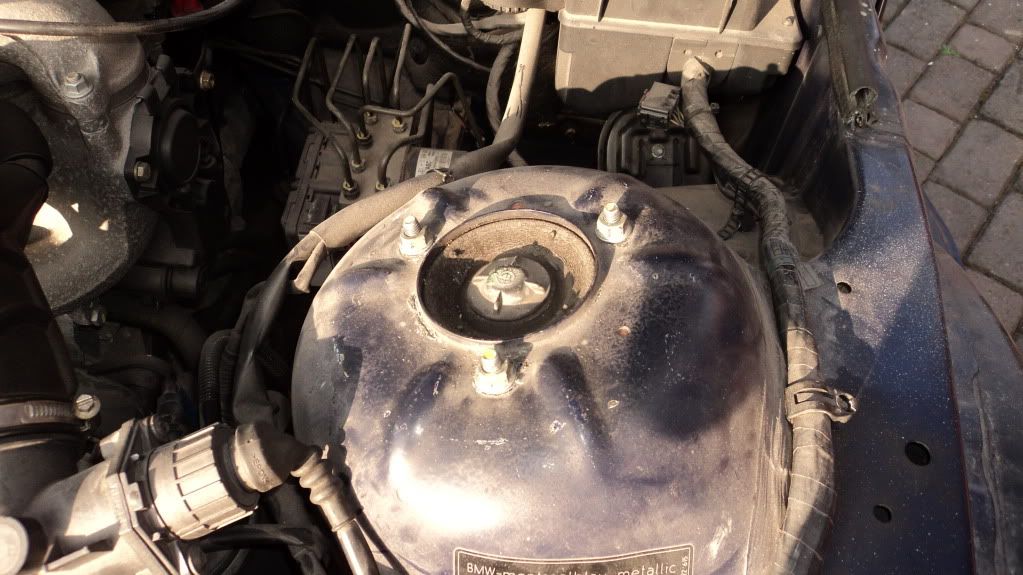
There is 3 bolts in the front strut tops under the bonnet.
<a href="http://s1091.photobucket.com/albums/i39 ... cs2012.jpg" target="_blank"><img src="http://i1091.photobucket.com/albums/i39 ... cs2012.jpg" border="0" alt="Strut top"></a>
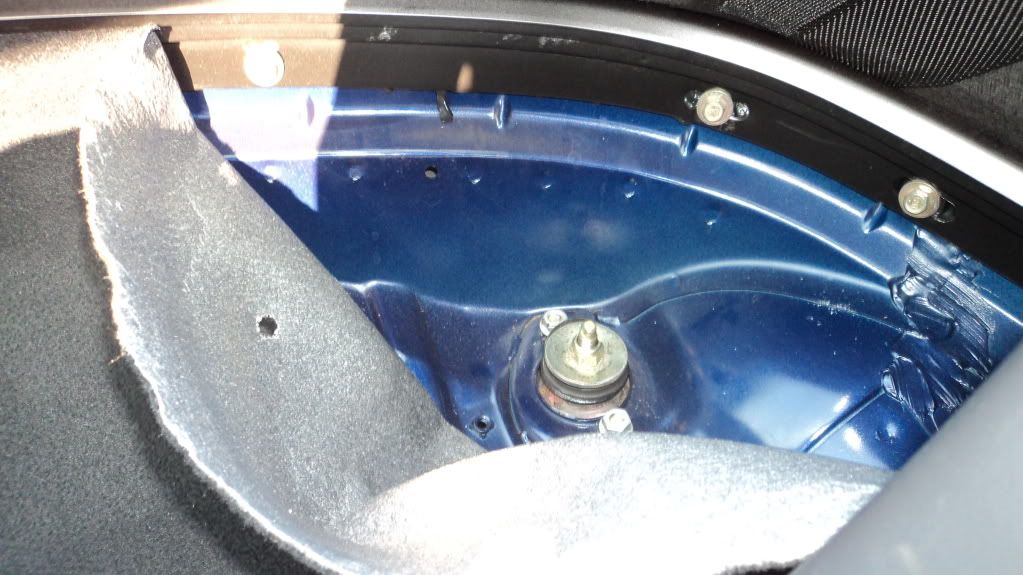
And 2 bolts for the rear strut tops found under the carpet where the roof folds into.
<a href="http://s1091.photobucket.com/albums/i39 ... cs2017.jpg" target="_blank"><img src="http://i1091.photobucket.com/albums/i39 ... cs2017.jpg" border="0" alt="rear strut top"></a>
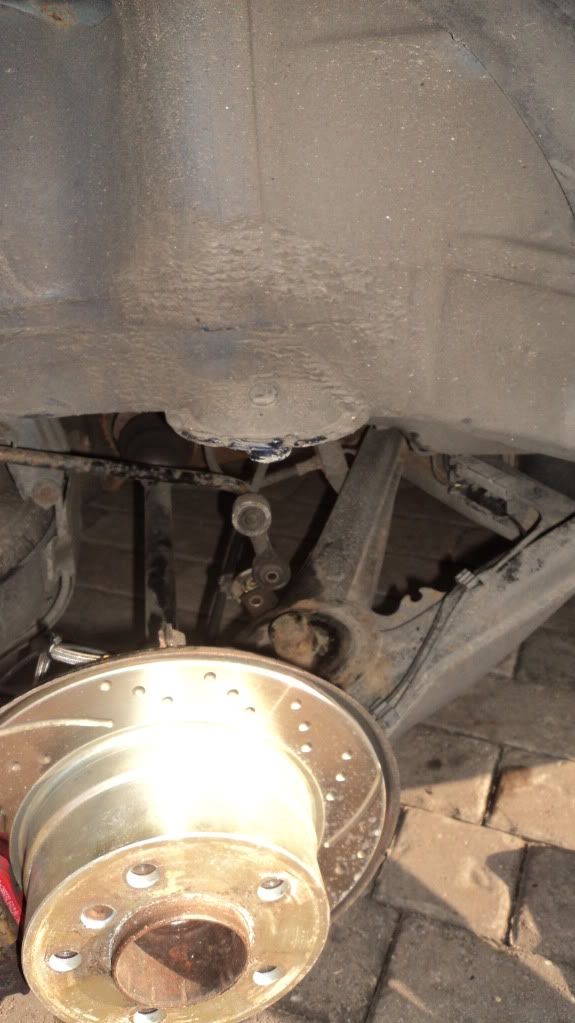
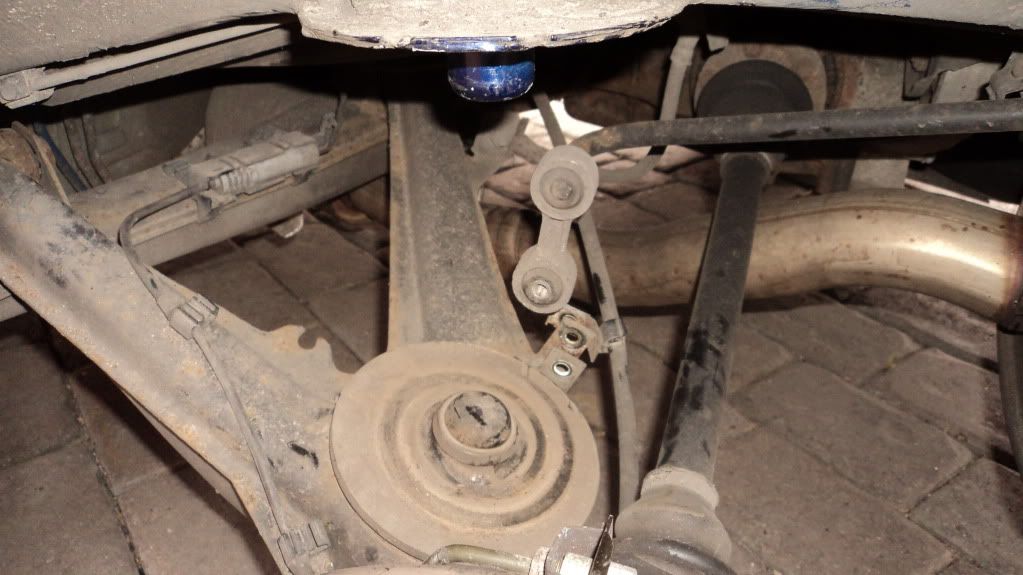
The shocks on the rear hubs are attached by only 1 bolt, you will have to remove the bolt from the anti roll bar drop link to facilitate removal of the rear spring and the installation of the new one.
<a href="http://s1091.photobucket.com/albums/i39 ... cs2015.jpg" target="_blank"><img src="http://i1091.photobucket.com/albums/i39 ... cs2015.jpg" border="0" alt="removed arb drop link"></a>
<a href="http://s1091.photobucket.com/albums/i39 ... cs2021.jpg" target="_blank"><img src="http://i1091.photobucket.com/albums/i39 ... cs2021.jpg" border="0" alt="rear spring mount"></a>
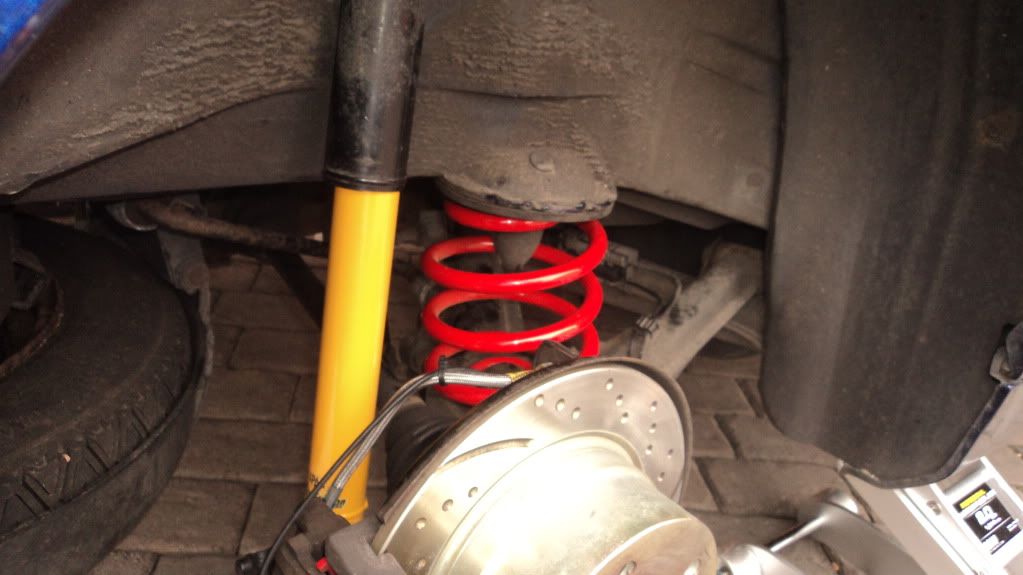
Once removed it is a straight forward job exchanging old for new. For the rears. No spring compressor was necessary for the rears.
<a href="http://s1091.photobucket.com/albums/i39 ... cs2019.jpg" target="_blank"><img src="http://i1091.photobucket.com/albums/i39 ... cs2019.jpg" border="0" alt="rsx shock and spring fitted"></a>
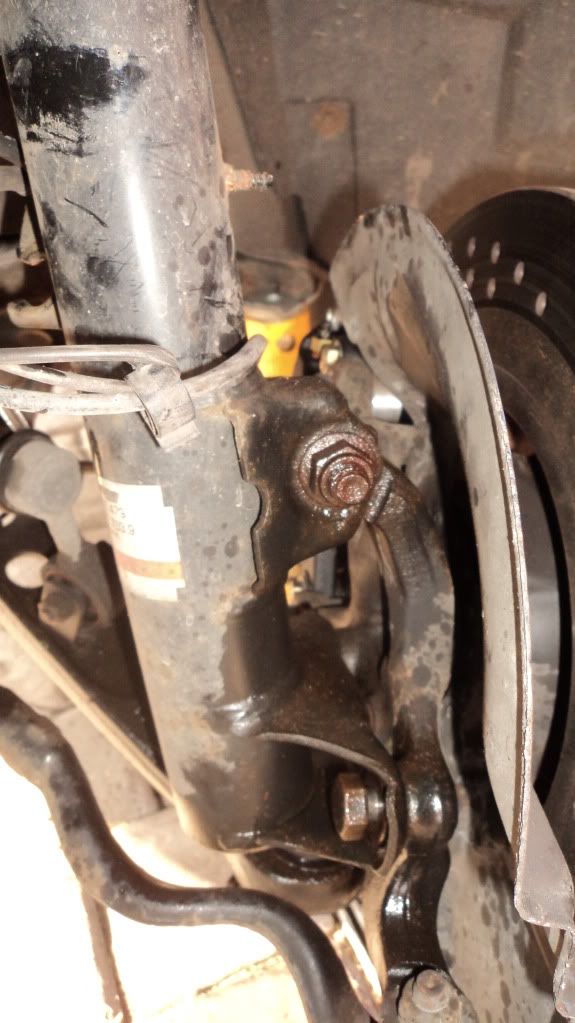
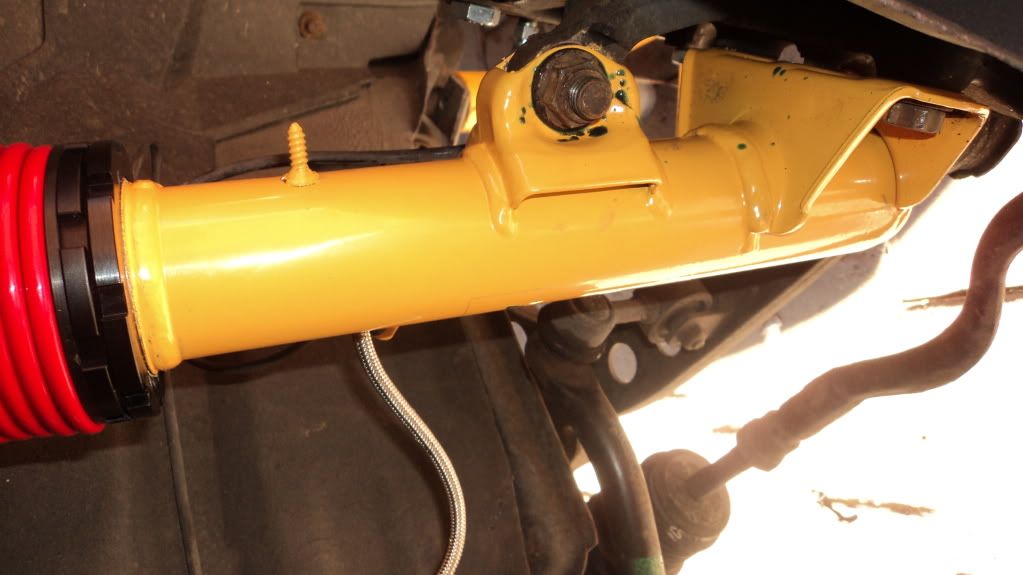
The front shocks are a little more tricky. There are 3 bolt fixings on back of each hub.
<a href="http://s1091.photobucket.com/albums/i39 ... cs2013.jpg" target="_blank"><img src="http://i1091.photobucket.com/albums/i39 ... cs2013.jpg" border="0" alt="strut rear view"></a>
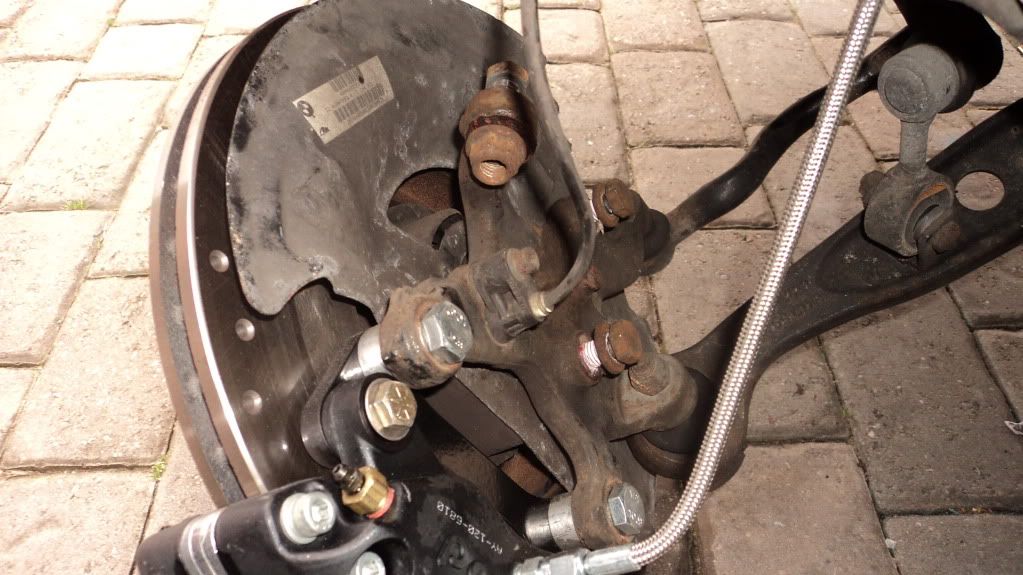
and with the old shock removed
<a href="http://s1091.photobucket.com/albums/i39 ... cs2023.jpg" target="_blank"><img src="http://i1091.photobucket.com/albums/i39 ... cs2023.jpg" border="0" alt="front hub bolt fixings"></a>
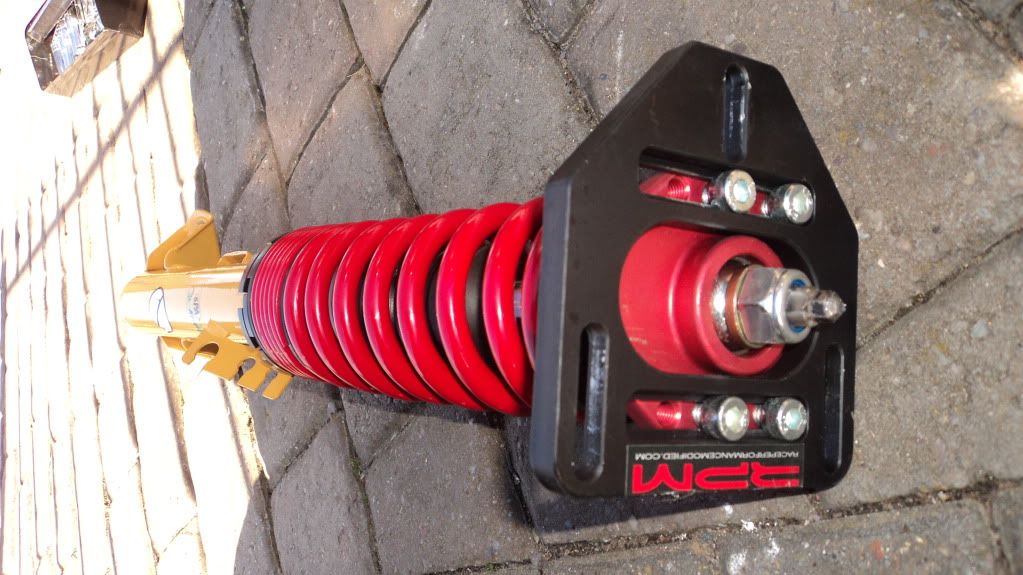
You will have to compress the new coil over springs and bolt the shocks to the adjustable top plates prior to installataion using a spring compressor. (this can be risky and dangerous so be forwarned)
<a href="http://s1091.photobucket.com/albums/i39 ... els003.jpg" target="_blank"><img src="http://i1091.photobucket.com/albums/i39 ... els003.jpg" border="0" alt="coil over and adjustable top"></a>
It is fairly straight forward to bolt everything back up. Three bolts with threadlock and torqued on the hub.
<a href="http://s1091.photobucket.com/albums/i39 ... els005.jpg" target="_blank"><img src="http://i1091.photobucket.com/albums/i39 ... els005.jpg" border="0" alt="coilover fixings"></a>
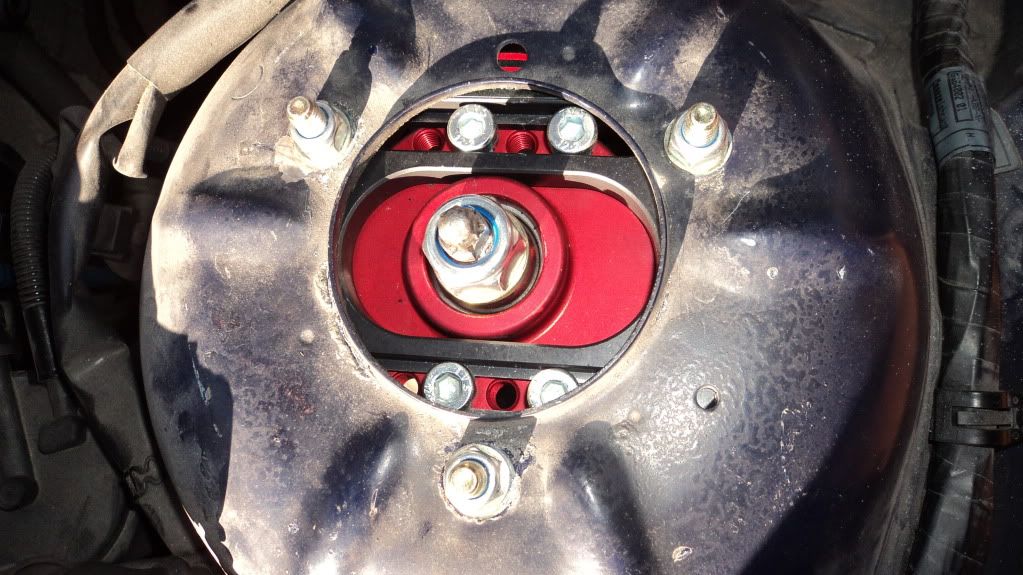
And 3 bolts with nylock nuts and some allen keys on the strut tops.
<a href="http://s1091.photobucket.com/albums/i39 ... els004.jpg" target="_blank"><img src="http://i1091.photobucket.com/albums/i39 ... els004.jpg" border="0" alt="rpm adgustable top"></a>
With everything bolted up I took the car for a test drive ( speedhumps are not forgiving but the set up encourages you to push the car hard and inspires confidence even before the alignement is done)
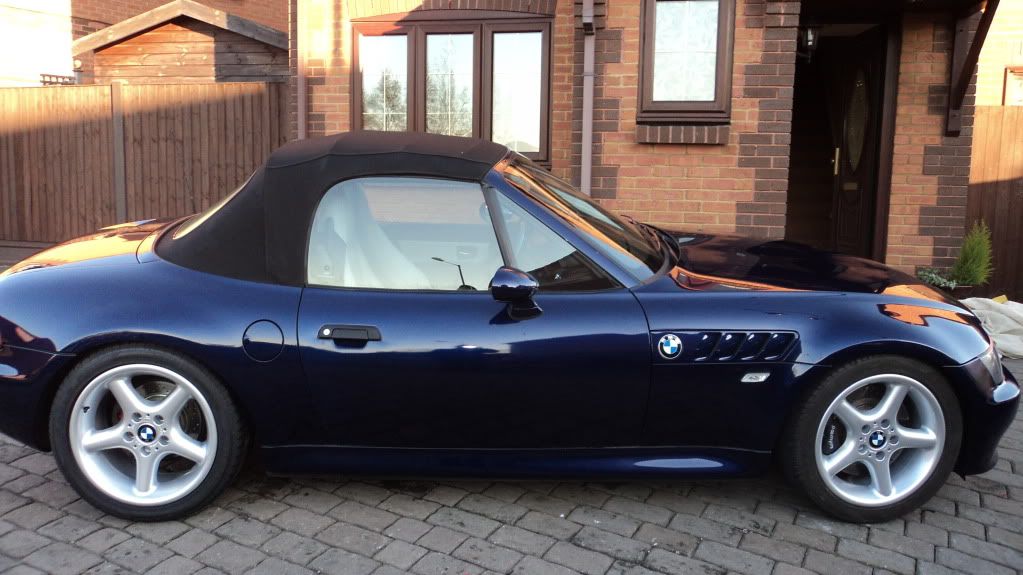
And how does the car look?
Take a look
Before
<a href="http://s1091.photobucket.com/albums/i39 ... eys030.jpg" target="_blank"><img src="http://i1091.photobucket.com/albums/i39 ... eys030.jpg" border="0" alt="Photobucket"></a>
After
<a href="http://s1091.photobucket.com/albums/i39 ... els008.jpg" target="_blank"><img src="http://i1091.photobucket.com/albums/i39 ... els008.jpg" border="0" alt="sitting much lower"></a>
Over all I think that the car sits much nicer. what do you think?
<a href="http://s1091.photobucket.com/albums/i39 ... els007.jpg" target="_blank"><img src="http://i1091.photobucket.com/albums/i39 ... els007.jpg" border="0" alt="the Z on its new shocks"></a>
This was not a difficuilt job overall. If a full on engine build and installation would be difficuilty 10 then this job would be a 5 or less.
I will be starting the engine work very soon now that the chassis is sorted.
Spax Coil-overs and alloy wheel refurb
Spax Coil-overs and alloy wheel refurb
Last edited by tangsou on Wed 09 Mar, 2011 08:32, edited 3 times in total.


-
markrnorton

- Joined: Mon 05 Jan, 2009 13:19
- Posts: 841


- Location: Essex
Hello Mark,markrnorton wrote:You sorted it then !!
looks much better. have you had it set-up yet or at least tracked ?
I haven`t had the tracking or any thing else looked at as yet.
It pulls dead straight when driving. The front wheels look straight up with no camber that I can see, as for toe in/out I can`t tell. The rears have some negative camber.
I plan a complete set up in a few weeks after I have fitted some adjustable anti roll bars and new drop links. The current front ARB`s are under some compression now the car is lower so I cannot see the drop links surviving long.
I have also purchased a pair of bride carbon backed reclining seats this weekend. They should be delivered in the next few days. I will post some pics when I recieve them and when they are fitted.

-
markrnorton
- Joined: Mon 05 Jan, 2009 13:19
- Posts: 841
-
- Location: Essex
Mr Silver wrote:If the anti roll bar is under tension when the car is standing on level ground you have a problem. Lowering the suspension makes no difference, the roll bars should be free of tension.
Hence the reason for fitting adjustable height arb`s.
The new struts are physically 35mm shorter therefore the hub sits 35mm higher than OEM. The arb is in its original position with the drop links attatching it to the hub in its 35mm higher position which puts it under compression (not a lot but some). More importantly the angle of the ARB ends will have changed and It will not work as efficiently in the wrong position.
It is not a problem but anticipated. I have lowered many cars with coil over kits and generally I would fit uprated adjustable ARB`s (the ones with lots of holes on the ends) at the same time. Unfortunatly budget is everything and they will have to wait.
Regards
-
markrnorton
- Joined: Mon 05 Jan, 2009 13:19
- Posts: 841
-
- Location: Essex
markrnorton wrote:Cant say i've notice a difference with mine lowered, with respect to the ARB
its obviosly under more tension but it hasnt caused an issue
I agree 100% Mark
At some point I would expect the droplinks to fail any how as they are over 10 years old. I do believe that This will come sooner with the new set up so uprated whiteline arb`s are already planned with poly bushed holders and new links.
Do you know if there is a poly bushed version available?
The new set up is in a totally different league compared to the saggy set up that was.
Road holding is now comparable to a much more modern car but a bit stiffer.
Dan
-
markrnorton
- Joined: Mon 05 Jan, 2009 13:19
- Posts: 841
-
- Location: Essex
I fitted polybushed droplinks on the past impreza I like the idea that they last forever. Rose jointed versions would also be be very nice, do you have some in mind?.markrnorton wrote:DAn
do you mean polybushed droplinks ?? not sure about that, i replaced them with new.
But i have a cunning plan to replace the droplinks with rose jointed versions, so they are then adjustable for length.
Mark
-
markrnorton
- Joined: Mon 05 Jan, 2009 13:19
- Posts: 841
-
- Location: Essex


-
shantybeater
- Joined: Wed 12 Mar, 2008 14:33
- Posts: 1967


- Location: UK
Looks great  those calipers look tasty
Progress Thread:http://www.zroadster.net/forum/viewtopi ... 32&t=36117
Previous - S54 M Roadster, S50 M Roadster, Ibiza Cupra IHI 340bhp, Ibiza Cupra K04 270bhp, 6n2 Polo GTi