Jonttt Imola II Red S54 Z3m Roadster Journal


Update: various cosmetic changes
I ordered a few bit and pieces based on things I had done on my previous ///M and liked.
Firstly fitted chrome door handle covers. These were sourced from eBay (£24.99 delivered steel metal type, you can get cheaper ones but these feel more robust) and are standard e36 (3 series) therefore you get 4 but have the option to fit two without key holes which I think look neater (worst case if central locking fails you would have to pull off the drivers one). These simply stick on and come with the required sticky pads.
I think these look even better on my red ///M and work with the stainless wheels really well.


To match the handles I got chrome ///M door locking pins with chrome base surrounds. These are really good quality, the old ones just pull off and these push on. They have an internal rubber grommet and so are a very snug fit. The chrome base comes with 3m sticky pad already fitted.

The wiper rubbers were worn so I fitted the new "AERO" type (as per current BMW models). There was recent thread on these (search AERO) and they were great on my last car. As well as looking neater they work great and are silent in use. Again sourced from eBay (for £10.44 delivered). They take all of 2 minutes to fit, the trick is to turn ignition on, turn on wipers, turn ignition off to stop wipers at vertical. You can now pull away at hinge from the window without the bonnet stopping them
old OEM ones

the new and old

the new


I ordered a few bit and pieces based on things I had done on my previous ///M and liked.
Firstly fitted chrome door handle covers. These were sourced from eBay (£24.99 delivered steel metal type, you can get cheaper ones but these feel more robust) and are standard e36 (3 series) therefore you get 4 but have the option to fit two without key holes which I think look neater (worst case if central locking fails you would have to pull off the drivers one). These simply stick on and come with the required sticky pads.
I think these look even better on my red ///M and work with the stainless wheels really well.
To match the handles I got chrome ///M door locking pins with chrome base surrounds. These are really good quality, the old ones just pull off and these push on. They have an internal rubber grommet and so are a very snug fit. The chrome base comes with 3m sticky pad already fitted.
The wiper rubbers were worn so I fitted the new "AERO" type (as per current BMW models). There was recent thread on these (search AERO) and they were great on my last car. As well as looking neater they work great and are silent in use. Again sourced from eBay (for £10.44 delivered). They take all of 2 minutes to fit, the trick is to turn ignition on, turn on wipers, turn ignition off to stop wipers at vertical. You can now pull away at hinge from the window without the bonnet stopping them
old OEM ones
the new and old
the new
Update: ZHP "short shift" gear stick fitted
The car had been fitted with an AC Schnizter "short shift" gearstick (ie shorter then OEM to give a quicker, more controled gear change)
I was not a massive fan of the look of this, a bit industrial for my liking but thought I would give it a go. I loved the precise feel it gave the gear change compared to the OEM one on my last ///M but could not get used to its looks and "cold" metalic feel.
I did a bit of research and decided that a much praised short shift gearstick from ZHP was the one for me. This was leather and importantly could be fitted with the ///M 5 gear motif (rather than the 6 gear). It is not illuminated as per the OEM but I hardly ever drive the car at night and I wanted to keep the short shift feel more.
I could not source one from the UK so ordered from leatherz in the USA for $70. (I also ordered OEM front mudflaps which BMW UK could not source for me for $28 and postage for all was $51.57).
Not the best time to order from the USA with the current exchange rate but I was keen to try out this item.
Fitting was a doddle, AC Schnitzer one had 3 small hex screws to undue and then just lifted off, the new one just pushes on.
AC Schnitzer one

Both side by side, note the ZHP is even shorter then the Schnitzer. Both are "weighted" to give a smoother feel.

The ZHP one fitted

I'm really happy with the way this looks, a lot more OEM than the Schnitzer but more importantly it gave me the excuse I needed to take the car out for a spin.
I can report that it feels fantastic, even better than the Schnitzer, more precise and a much better feel in the palm, highly recommended
The car had been fitted with an AC Schnizter "short shift" gearstick (ie shorter then OEM to give a quicker, more controled gear change)
I was not a massive fan of the look of this, a bit industrial for my liking but thought I would give it a go. I loved the precise feel it gave the gear change compared to the OEM one on my last ///M but could not get used to its looks and "cold" metalic feel.
I did a bit of research and decided that a much praised short shift gearstick from ZHP was the one for me. This was leather and importantly could be fitted with the ///M 5 gear motif (rather than the 6 gear). It is not illuminated as per the OEM but I hardly ever drive the car at night and I wanted to keep the short shift feel more.
I could not source one from the UK so ordered from leatherz in the USA for $70. (I also ordered OEM front mudflaps which BMW UK could not source for me for $28 and postage for all was $51.57).
Not the best time to order from the USA with the current exchange rate but I was keen to try out this item.
Fitting was a doddle, AC Schnitzer one had 3 small hex screws to undue and then just lifted off, the new one just pushes on.
AC Schnitzer one
Both side by side, note the ZHP is even shorter then the Schnitzer. Both are "weighted" to give a smoother feel.
The ZHP one fitted
I'm really happy with the way this looks, a lot more OEM than the Schnitzer but more importantly it gave me the excuse I needed to take the car out for a spin.
I can report that it feels fantastic, even better than the Schnitzer, more precise and a much better feel in the palm, highly recommended
I finally got a chance to get the car out for its first real run yesturday (first since I got it and first since new clutch and flywheel).
Was a nice sunny afternoon so decided to take a run over to Demon Tweeks in Wales. I can get there via some great A and B roads in about 40 minutes and stopped off via Outlon Park Race Circuit on the way.
Wow , the car is awesome, just a nice concentration of traffic to have some good safe overtaking and really get to know the engine. The exhaust note, the short shift and the acceleration was so intoxicating, roof down and massive grin all the way.
The car is so much more planted around the twisties then my previous ///M, probably a combination of my previous ///M needing new dampers (after 80,000 miles) and the AC Schnitzer kit on this.
I think the engine remap has moved the rev limiter back to 8,000 RPM as per the S54 M3's and it reaches it so effortlessly I really had to concentrate on my gearchanges to get the timing right. Seems much free'er revving (and hence seems to push on that bit more urgently) than the S50 especially over 6,000 RPM. Not sure how much of this is down to the sports exhaust as well.
Unbelievably the British Automobile Racing Club had there series deciders on at Oulton (I did not check if anything was on before I set off) and as I arrived the track was full of BMW privateers includng a race prep Z3. Had great fun watching people go around (or try) the skid track at the entrance and got some great feedback on the car from people stood around.
Today was what its all about for me, a real bit of exhilerating fun in the sun to remind me of what driving should be about, its what I'll be thinking about on my daily motorway chore to bring a smile back to my face
Was great to see quite a few other zeds out and about with their roofs down as well.
Is going to be a long winter for me with the Z in winter storage but yesturday by itself will give me something to look forward to next spring
This year has been a massive and fun learning experience with the Z3's and this forum has been invaluable to me. Best decision I've made in a long time to invest in a Z3 hobby car
Was a nice sunny afternoon so decided to take a run over to Demon Tweeks in Wales. I can get there via some great A and B roads in about 40 minutes and stopped off via Outlon Park Race Circuit on the way.
Wow
The car is so much more planted around the twisties then my previous ///M, probably a combination of my previous ///M needing new dampers (after 80,000 miles) and the AC Schnitzer kit on this.
I think the engine remap has moved the rev limiter back to 8,000 RPM as per the S54 M3's and it reaches it so effortlessly I really had to concentrate on my gearchanges to get the timing right. Seems much free'er revving (and hence seems to push on that bit more urgently) than the S50 especially over 6,000 RPM. Not sure how much of this is down to the sports exhaust as well.
Unbelievably the British Automobile Racing Club had there series deciders on at Oulton (I did not check if anything was on before I set off) and as I arrived the track was full of BMW privateers includng a race prep Z3. Had great fun watching people go around (or try) the skid track at the entrance and got some great feedback on the car from people stood around.
Today was what its all about for me, a real bit of exhilerating fun in the sun to remind me of what driving should be about, its what I'll be thinking about on my daily motorway chore to bring a smile back to my face
Was great to see quite a few other zeds out and about with their roofs down as well.
Is going to be a long winter for me with the Z in winter storage but yesturday by itself will give me something to look forward to next spring
This year has been a massive and fun learning experience with the Z3's and this forum has been invaluable to me. Best decision I've made in a long time to invest in a Z3 hobby car


BECKER CASCADE Headunit Install:
I had removed this headunit from my previous ///M and finally had chance to install it last weekend.
I did quite a bit of research on headunits for my first Z and settled on the Becker for functionality (Sat Nav, Bluetooth, full iPod interface) and maintenance of the OEM look.
These really are the "bees knees" of headunits and fit / suit the Z3 console so well. The cascade version has 15 different display colours so you can get an almost perfect match to the Z3 internal lighting.
There was already a good JVC unit fitted when I bought the car which actually looked / performed well but you can see how much better the Becker looks in terms of fit etc....
The iPod connection is in the glove box were I leave an old 40gb unit permanently connected. The bluetooth hands free mic is easily rooted up at the top of the windscreen next to the rear view mirror and the Sat Nav GPS reciever is tucked away in a corner at the top of the dash, all wiring completely hidden.
JVC unit removed

Becker Cascade Installed

more info on the Becker click here
I had removed this headunit from my previous ///M and finally had chance to install it last weekend.
I did quite a bit of research on headunits for my first Z and settled on the Becker for functionality (Sat Nav, Bluetooth, full iPod interface) and maintenance of the OEM look.
These really are the "bees knees" of headunits and fit / suit the Z3 console so well. The cascade version has 15 different display colours so you can get an almost perfect match to the Z3 internal lighting.
There was already a good JVC unit fitted when I bought the car which actually looked / performed well but you can see how much better the Becker looks in terms of fit etc....
The iPod connection is in the glove box were I leave an old 40gb unit permanently connected. The bluetooth hands free mic is easily rooted up at the top of the windscreen next to the rear view mirror and the Sat Nav GPS reciever is tucked away in a corner at the top of the dash, all wiring completely hidden.
JVC unit removed
Becker Cascade Installed
more info on the Becker click here

Well I got around to sorting out the roof which had "come away" from the rear window seal.
This is a common problem thats looks a lot worse than it is (it looks like the canvas has ripped but it is just the edge, great bargaining point if your looking a buying a Z and it has this problem ). I'm convinced its caused by the "grip"on the rear window loosening over time. I had this problem with my previous ///M which was cured when I fitted a new rear screen ie the new grip "kept hold" of the canvas roof edge.
On my new car the rear windscreen does not need replacing so I decided to get the extra grip back by using silicon sealent.
I'm convinced the hard top had been on the car for some considerable time before I bought the car and so I have left the roof for 4 weeks to "stretch" back into shape. This has definately worked and made it very easy to re seal the edging.
I released the roof catches so that the roof was open about 2 inches. This releases the pressure on the canvas roof whilst the sealant cures overnight.
It was just a matter of pulling the canvas edging back a little and "squirting" a bead of sealant underneath and then pushing the edge under the rubber gripper.
The following day the sealant had done its job and the roof can be raised lowered now without the edging coming away
This is how it was when I first removed the hardtop last month


And this is the finished job, as good as new

I used Loctite silicon sealant from Halfords (nb you don't need to use much this was an old tube I had)

This is a common problem thats looks a lot worse than it is (it looks like the canvas has ripped but it is just the edge, great bargaining point if your looking a buying a Z and it has this problem
On my new car the rear windscreen does not need replacing so I decided to get the extra grip back by using silicon sealent.
I'm convinced the hard top had been on the car for some considerable time before I bought the car and so I have left the roof for 4 weeks to "stretch" back into shape. This has definately worked and made it very easy to re seal the edging.
I released the roof catches so that the roof was open about 2 inches. This releases the pressure on the canvas roof whilst the sealant cures overnight.
It was just a matter of pulling the canvas edging back a little and "squirting" a bead of sealant underneath and then pushing the edge under the rubber gripper.
The following day the sealant had done its job and the roof can be raised lowered now without the edging coming away
This is how it was when I first removed the hardtop last month
And this is the finished job, as good as new
I used Loctite silicon sealant from Halfords (nb you don't need to use much this was an old tube I had)
Update: replacement "shadow" indicator and sidelight lenses.
I saw these advertised on eBay and got both sets for a total of just over £20 delivered. a bit of a bargain as they cost considerably more than this from america
They look like they are unused and still have the original seals protecting the bulb holes in transit.

Comparison the the original "clear" lenses


They are tinted plastic and not just a film coating so will not fade / wear off over time. OEM quality so very pleased with them.
Comparison on the car before/after


The fronts in particular are more "stream lined" to the bumper than the OEM ones and give a neater finish.

I'll keep hold of the OEM clear lenses in case I ever fancy a change back but I'm pretty chuffed with the way these look and the quality of them.
For reference they are very easy to remove, the units just push forward onto a spring and lift off from the rear, 5 min job to do all 4.
I retained the LED 501 bulbs fitted to the front sidelights (they came with amber bulbs as in the USA these are indicators not sidelights). The side indicators were already fitted with stealth chrome bulbs so I also retained these rather than have an orange tinge to the lens.
I saw these advertised on eBay and got both sets for a total of just over £20 delivered. a bit of a bargain as they cost considerably more than this from america
They look like they are unused and still have the original seals protecting the bulb holes in transit.
Comparison the the original "clear" lenses
They are tinted plastic and not just a film coating so will not fade / wear off over time. OEM quality so very pleased with them.
Comparison on the car before/after
The fronts in particular are more "stream lined" to the bumper than the OEM ones and give a neater finish.
I'll keep hold of the OEM clear lenses in case I ever fancy a change back but I'm pretty chuffed with the way these look and the quality of them.
For reference they are very easy to remove, the units just push forward onto a spring and lift off from the rear, 5 min job to do all 4.
I retained the LED 501 bulbs fitted to the front sidelights (they came with amber bulbs as in the USA these are indicators not sidelights). The side indicators were already fitted with stealth chrome bulbs so I also retained these rather than have an orange tinge to the lens.


They are Breyton Magic Racing. There is a lot of info on the first page of the thread.rhendo1 wrote:Jonttt,
Love the wheels. I have been looking for a new set myself. What type are they?
They are obsolete now, I spent 6 months trying to source them for my first ///M without success so they add to the rarity factor of the car as no one can copy my wheels
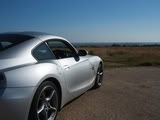
I had a chance last night to take some better pictures before Winter sets in good and proper.
The first one is a little dark but I've included it because it was taken in manual mode and actually shows the red more realistically. Cameras tend to overcompensate for reds in Auto mode and the car usually looks more "orange" in pictures than it is in the flesh. (ie compare it to the second picture which was taken in full auto mode and although "brighter" the red is not as accurate)
It was getting a little dark for pictures so there is some camera shake (I didn't have my tripod) but these will do until next summer. Now which one shall I have as my desktop background
Manual Exposure, a bit atmospheric.....

The same picture in Auto mode.....

A few more in Auto mode......


From the drivers seat.....

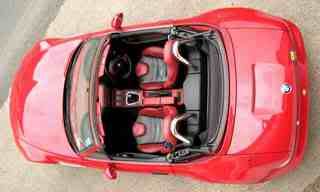
All Open.....

note: the car has simply been hand washed with McGuires shampoo since its original clay and polish.
I have reproofed the roof again as I did not feel the OEM proofer I used was up to the standard I'd had on my first ///M (ie water was "pooling" a little in the centre) So I used the "no messing" tent proofer (a lot cheaper than the car specific stuff and works as good as the best of them). The water now "chucks" itself off
The first one is a little dark but I've included it because it was taken in manual mode and actually shows the red more realistically. Cameras tend to overcompensate for reds in Auto mode and the car usually looks more "orange" in pictures than it is in the flesh. (ie compare it to the second picture which was taken in full auto mode and although "brighter" the red is not as accurate)
It was getting a little dark for pictures so there is some camera shake (I didn't have my tripod) but these will do until next summer. Now which one shall I have as my desktop background
Manual Exposure, a bit atmospheric.....
The same picture in Auto mode.....
A few more in Auto mode......
From the drivers seat.....
All Open.....
note: the car has simply been hand washed with McGuires shampoo since its original clay and polish.
I have reproofed the roof again as I did not feel the OEM proofer I used was up to the standard I'd had on my first ///M (ie water was "pooling" a little in the centre) So I used the "no messing" tent proofer (a lot cheaper than the car specific stuff and works as good as the best of them). The water now "chucks" itself off


Echo everybodies thoughts absolutley stunning Jonttt. I look forward to meeting you on Sunday and drooling over your car.
Aceman
Arctic Silver '98 Z3M
Previously;
Bright RED '99 Z3 2.8
Rocking seats ? You need seat bushes click HERE
Arctic Silver '98 Z3M
Previously;
Bright RED '99 Z3 2.8
Rocking seats ? You need seat bushes click HERE

Looking absolutely great, makes me feel guilty for neglecting Charlotte. Out hooning 2 weeks ago and due another on Sunday with a quick wash n wax in between.
Still she gets used as she should be.
Jon we really should get arrange a meet - perhaps mid way between kent and oop North sooner rather than later?
Still she gets used as she should be.
Jon we really should get arrange a meet - perhaps mid way between kent and oop North sooner rather than later?


Superb job done John. Looking at the photos it appears your car has the original shocks. At your car's mileage they could now be less than perfect.
If so as mine were then the effect is very detrimental. Worth checking out. My new B6 Bilsteins on the rear have transformed the handling.
Now feels much more agile & more fun to drive.
If so as mine were then the effect is very detrimental. Worth checking out. My new B6 Bilsteins on the rear have transformed the handling.
Now feels much more agile & more fun to drive.
'High G' motoring enthusiast
Robin
I actually has the full AC Schnitzer Sport Suspension. When I spoke to DavidM (who had it fitted) about it he said then when it was first fitted the rear was too low and he had it adapted to give more ride height. Thats why it does not "sit" as low as you would normally expect.
I've heard various reports of the AC Schnitzer setup being quite harsh for everyday use (I had been thinking of a K&W variant 3 setup for my previous ///M). However, I must say in practice I'm very pleased with it. Certainly compared to first ///M which was on stock suspension and 80k miles (and the dampers probably a little "tired") it feels as though its on rails and is not too harsh at all. Whether the increased ride height has affected the setup I'm not sure but I'm happy enough to have no reason to change it (for now ).
Things in consideration after this summer are:
- 10/15mm hub centric spacers for the rears as the current setup is actually 5mm less than stock, this should fill the arches to the lip. The fronts are spot on.
- H&R anti roll bars
- Big brake kit
After that I think I'll run out of things I can do to it apart from some cosmetic tinkering (and maybe a modified CSL induction kit).
I actually has the full AC Schnitzer Sport Suspension. When I spoke to DavidM (who had it fitted) about it he said then when it was first fitted the rear was too low and he had it adapted to give more ride height. Thats why it does not "sit" as low as you would normally expect.
I've heard various reports of the AC Schnitzer setup being quite harsh for everyday use (I had been thinking of a K&W variant 3 setup for my previous ///M). However, I must say in practice I'm very pleased with it. Certainly compared to first ///M which was on stock suspension and 80k miles (and the dampers probably a little "tired") it feels as though its on rails and is not too harsh at all. Whether the increased ride height has affected the setup I'm not sure but I'm happy enough to have no reason to change it (for now
Things in consideration after this summer are:
- 10/15mm hub centric spacers for the rears as the current setup is actually 5mm less than stock, this should fill the arches to the lip. The fronts are spot on.
- H&R anti roll bars
- Big brake kit
After that I think I'll run out of things I can do to it apart from some cosmetic tinkering (and maybe a modified CSL induction kit).
Snake Pass - Peak District
I travelled over to the BMW Club meet at Sytners in Sheffield today. Unfortunately the most direct route for me is along one of the best driving roads in the UK, the Snake Pass over the Peak District .
I decided to set of early in the hope of avoiding any traffic but with enough light to take some photographs..... and I wasn't disappointed having the pass virtually to myself .
The roads where a little greasy but the colder morning air at this time of year really added some "punch" to the car


Unfortunately the way back was not so much fun, by 3pm the road was full of "Sunday Drivers" as far as you could see
ps Anyone spot the new addition ?
I decided to set of early in the hope of avoiding any traffic but with enough light to take some photographs..... and I wasn't disappointed having the pass virtually to myself
The roads where a little greasy but the colder morning air at this time of year really added some "punch" to the car
Unfortunately the way back was not so much fun, by 3pm the road was full of "Sunday Drivers" as far as you could see
ps Anyone spot the new addition ?


Re: Snake Pass - Peak District
The roof?Jonttt wrote:The roads where a little greasy but the colder morning air at this time of year really added some "punch" to the car
ps Anyone spot the new addition ?
Why was it up?
Just think - you could have lowered it for the fotos and we'd have been none the wiser (unless Jamezee blagged on you)
Jamezee, so sorry I didn't wave back, I was on the phone (hands free) and missed the opportunity but I did see youJamezee wrote:Lovely car, I spotted you driving through Glossop this afternoon, I was in a silver zed going in the opposite direction, you might have noticed me waving and pointing at you, other half thought I had gone mad when I exclaimed 'Thats Jonttt, thats Jonttt'
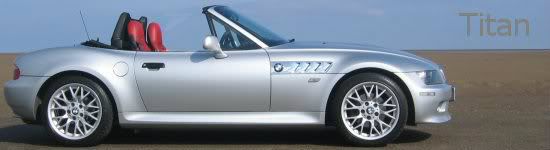
Titan, I had the roof down quite a bit, great day in the Z, I think the pictures with the roof up are unusual because its usually down
ps Ragtop wins, I'm not sure about the S54 badge (but if you've got it flaunt it ?)
Last edited by Jonttt on Mon 12 Oct, 2009 09:24, edited 1 time in total.

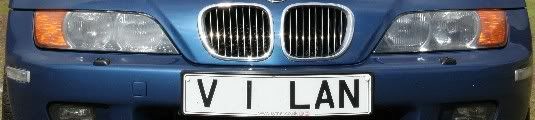
Agreed, and the one of the kidney grille too - the car says ///M all over it without having to shout about it as well. You'll have a shopping list down the door next.PVR wrote:No, lose that badge - not nice ...
Love the photos though. Even on a dull morning the hills make an interesting backdrop.
Cheers R.
Arctic Silver '99 Z3 1.9 & Black '59 Frogeye 1275cc


Looking great jonttt  Zed is credit to you.
Do you have any links for the tinted lenses on fleabay please? I did a search but nothing came up. I have been thinking of changing mine although I'm unsure if they might look odd with having a clear 3rd brake light.
Armrest and door pads arrived yesterday from Simon at JustRoadster and have to say really please with them, quality is spot on. Just got to get around to fitting them, weekends seem so short at the mo
Tim.

2001 Z3 1.9 Roadster Sport - 2012 Z4 sDrive 2.0 M Sport


TitanTim, I got them from a private buyer. I did a quick search myself before I bid to get an idea of cost new. I could find smoked indicators but not the side lights. The seller told me he had get them from the USA but could not remember where. Simon at www.justroadster.com has the smoked indicatorsTitanTim wrote:Looking great jonttt
Do you have any links for the tinted lenses on fleabay please? I did a search but nothing came up. I have been thinking of changing mine although I'm unsure if they might look odd with having a clear 3rd brake light.
Armrest and door pads arrived yesterday from Simon at JustRoadster and have to say really please with them, quality is spot on. Just got to get around to fitting them, weekends seem so short at the mo
Tim.
Thanks jonttt, I will have a look and see what I can get over the pond. Can't imagine they are too pricey so can always swap them back.Jonttt wrote:TitanTim, I got them from a private buyer. I did a quick search myself before I bid to get an idea of cost new. I could find smoked indicators but not the side lights. The seller told me he had get them from the USA but could not remember where. Simon at www.justroadster.com has the smoked indicatorsTitanTim wrote:Looking great jonttt
Do you have any links for the tinted lenses on fleabay please? I did a search but nothing came up. I have been thinking of changing mine although I'm unsure if they might look odd with having a clear 3rd brake light.
Armrest and door pads arrived yesterday from Simon at JustRoadster and have to say really please with them, quality is spot on. Just got to get around to fitting them, weekends seem so short at the mo
Tim.
Tim.
2001 Z3 1.9 Roadster Sport - 2012 Z4 sDrive 2.0 M Sport
-
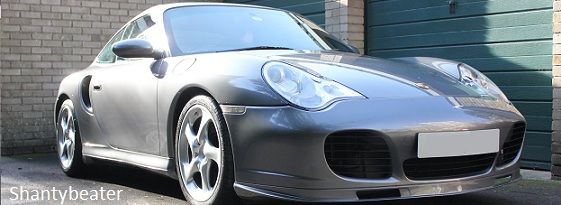
shantybeater
- Joined: Wed 12 Mar, 2008 14:33
- Posts: 1967


- Location: UK
wow looks seriously clean  good job mate
I tend to agree on the badges, ditch them both ! the car will attract enough attention as it is!!
I tend to agree on the badges, ditch them both ! the car will attract enough attention as it is!!
Progress Thread:http://www.zroadster.net/forum/viewtopi ... 32&t=36117
Previous - S54 M Roadster, S50 M Roadster, Ibiza Cupra IHI 340bhp, Ibiza Cupra K04 270bhp, 6n2 Polo GTi


Jon...Jonttt wrote:Update: ZHP "short shift" gear stick fitted....."weighted" to give a smoother feel.
Can you confirm the weight of the ZHP knob?
The blurb on LeatherZ says 5.4oz which (if my sums are correct) is approx 150g which is very light. Does that seem right to you?
I'm currently using the Storm Motorwerks V2 which according to Storm weighs in at 460g. It's weighted just right and feels great, but I much prefer the OEM leather look of your ZHP.
Cheers.
A.
Alfie, I will weigh it for you when I get back home (on the road for a few days )
Edit, removed the gearknob and weighed it and the weight quoted is correct, weighs 153g on my scales.
Not sure how much difference it makes but most of that weight is definately biased at the top.
My car has the AC Schnitzer short shift kit fitted so not sure how much difference that makes as well. I went from a standard ///M shift and gearknob in my S50 to the short shift and AC Schnitzer gearknob then the ZHP in the S54. Its definately more precise than the S50 was but how much is short shift and how much gearknob is had to tell without a direct comparison.
I can confirm the AC Schnitzer gearknob is heavier than the ZHP at 176g but its weight is more even. In use the ZHP feels better as its shorter so I'm guessing this fact and the biase of the weight compensates in actual use?
Thats a damn heavy gearknob you've got there though, does it affect fuel consumption
Last edited by Jonttt on Fri 23 Oct, 2009 18:54, edited 1 time in total.
Halo Projector Headlight Install
I had installed these OEM quality aftermarket headlights on my first Z3m and loved them so had to fit them to my new one
I documented the first install HERE
The only issue I had this time is that the passenger side indicator lead was too short by about 2 inches and so I had to extend the wiring Others have reported this and it seems to depend very much on how the cars wiring harness has been fitted at the factory ie on this car there is much more electrical tape connecting all parts of the wiring harness together in the engine bay meaning there is no free play in the indicator wires.
I also decided to fit some OSRAM aftermarket bulbs to the dip and headlights. This will save me removing the units to fit these later (its a real pain to replace bulbs with the headlights in place).
The replacement bulbs, about £10 per pair from eBay (nb same bulbs for dip and headlights)

The replacement lights fitted


As with my first install I wired the Halo rings to the sidelights which gives much better visability to the car with just sidelights on.
I'm keeping the original units in case I ever want to return to OEM look. I'm not really a fan of aftermarket headlights but I really think these freshen up the look of the car without looking to much aftermarket (as they are very much in the style of the current BMW range).
The real bonus though is that the Projectors really do offer much better performance in the dark than the original lights which are a bit useless.
I documented the first install HERE
The only issue I had this time is that the passenger side indicator lead was too short by about 2 inches and so I had to extend the wiring
I also decided to fit some OSRAM aftermarket bulbs to the dip and headlights. This will save me removing the units to fit these later (its a real pain to replace bulbs with the headlights in place).
The replacement bulbs, about £10 per pair from eBay (nb same bulbs for dip and headlights)
The replacement lights fitted
As with my first install I wired the Halo rings to the sidelights which gives much better visability to the car with just sidelights on.
I'm keeping the original units in case I ever want to return to OEM look. I'm not really a fan of aftermarket headlights but I really think these freshen up the look of the car without looking to much aftermarket (as they are very much in the style of the current BMW range).
The real bonus though is that the Projectors really do offer much better performance in the dark than the original lights which are a bit useless.
Centre Armrest Fitted
Well I finally got around to fitting the centre armrest I purchased from Simon at http://www.justroadster.com/
These are made using the OEM centre drinks holder accessory which is adapted to have a leather padded armrest lid.
I have the second production one (Titan Tim got the first one) and the first to be fitted to a Z3 with the non smokers package.
Installation took me............ 2 minutes
On cars with the smokers package the ashtray has to be removed (really easy job) but on mine without an ashtray you simply pull out the storage tray and put in the armrest. Install time included taking pictures its that easy.
Original non smokers centre consol

Pull out the front storage tray and rear storage tray mat

There is a small lip on the front of the new armrest

This fits into an existing hole in the centre consol that is normally hidden by the ashtray / storage tray

So you fit front lip first (lip into hole) and push the rear down into the rear storage tray.
The installation instructions suggest screwing the rear section down into the centre consol but I did not do this. As this is basically an OEM part with a customised lid/armrest the fit is absolutely perfect. Pushing the rear down into the rear storage tray is so snug it will not move anywhere unless you want to pull it out again. So I decided to leave it like this.
The quality of the customised lid is OEM. This part is hand made and Simon sends it off to be upholstered in good quality leather.

The lid lifts up to reveal a second drinks holder and concealed storage tray

I think the black really suits the 2 tone leather in my car, I have a red/black/red/black/red/black/red effect now running across the seats. My car already has additional red leather on top of the rear unit (between the headrests) and armrests but despite this I think this unit in red would be too much and the black suits it better.


After the exhaustion of fitting I had to treat myself and go for a drive to try it out. I did a combination of motorway cruising and country lanes. At first it felt a little odd having it there but it soon felt very natural. The contoured shape if perfect for me so as not to be obtrusive whilst changing gears quickly but at the same time allowing a relaxed driving position when cruising.
The adaption of the OEM part to create an armrest and hidden storage try is extremely well implemented and when fitted looks as if it was made with the car which is always the deciding factor for me with aftermarket add ons.
For info the 3 small "notches" at the front of the unit are actually to hold american coins (they are spring loaded and compress down) an indication that the base OEM unit was designed for the american market. Aparently they can be "enlarged" to hold UK coins but I'm not going to do this as I would not leave coins on display at any time for security reasons. I think they actually look quite good as a feature and don't detract from the asthetics of the unit.
These are made using the OEM centre drinks holder accessory which is adapted to have a leather padded armrest lid.
I have the second production one (Titan Tim got the first one) and the first to be fitted to a Z3 with the non smokers package.
Installation took me............ 2 minutes
On cars with the smokers package the ashtray has to be removed (really easy job) but on mine without an ashtray you simply pull out the storage tray and put in the armrest. Install time included taking pictures its that easy.
Original non smokers centre consol
Pull out the front storage tray and rear storage tray mat
There is a small lip on the front of the new armrest
This fits into an existing hole in the centre consol that is normally hidden by the ashtray / storage tray
So you fit front lip first (lip into hole) and push the rear down into the rear storage tray.
The installation instructions suggest screwing the rear section down into the centre consol but I did not do this. As this is basically an OEM part with a customised lid/armrest the fit is absolutely perfect. Pushing the rear down into the rear storage tray is so snug it will not move anywhere unless you want to pull it out again. So I decided to leave it like this.
The quality of the customised lid is OEM. This part is hand made and Simon sends it off to be upholstered in good quality leather.
The lid lifts up to reveal a second drinks holder and concealed storage tray
I think the black really suits the 2 tone leather in my car, I have a red/black/red/black/red/black/red effect now running across the seats. My car already has additional red leather on top of the rear unit (between the headrests) and armrests but despite this I think this unit in red would be too much and the black suits it better.
After the exhaustion of fitting
The adaption of the OEM part to create an armrest and hidden storage try is extremely well implemented and when fitted looks as if it was made with the car which is always the deciding factor for me with aftermarket add ons.
For info the 3 small "notches" at the front of the unit are actually to hold american coins (they are spring loaded and compress down) an indication that the base OEM unit was designed for the american market. Aparently they can be "enlarged" to hold UK coins but I'm not going to do this as I would not leave coins on display at any time for security reasons. I think they actually look quite good as a feature and don't detract from the asthetics of the unit.
Looks great jon I decided to screw mine down as it wasn't as tight a fit, as you say I think its a smashing little mod to the interior and a useful one too. I think you had the advantage of not having to hoover out 8 years of fluff, skin, hair and fingernails from underneath the ashtray I don't know what the previous owners had been doing in the car
Tim.
Tim.
2001 Z3 1.9 Roadster Sport - 2012 Z4 sDrive 2.0 M Sport