Keith's Dakar M Coupe Journal. Update 27/03/10

Post pictures of your car and discuss it here. One car per thread, and keep it on-topic, please!
User avatar
Keith
Joined: Sat 07 Nov, 2009 14:56
Posts: 85

  M coupe S50
Location: Maidenhead

Keith's Dakar M Coupe Journal. Update 27/03/10

Post by Keith »

It's about time I started up a journal on here. I have one on my 'home' forum (e36coupe.com) and a few bits on the coupe-specific Z forum, but seeing as this place is a big community of all-things 'Z', I think I should share it here too, in the hope of an appreciative audience.

I love reading other people's journals of all things BMW; I just love the cars and find each persons journey and direction inspiring - I hope my journal may be interesting for others to read too.


My Previous Cars
Cut my driving teeth in E36s (first car after passing my test was a 328), bought another 328 after that, then a 330 Clubsport, and now the Z3 M Coupe.

In order;

1997 Cosmos 328i E36. Saffron Leather. Standard bodyshape.
Image

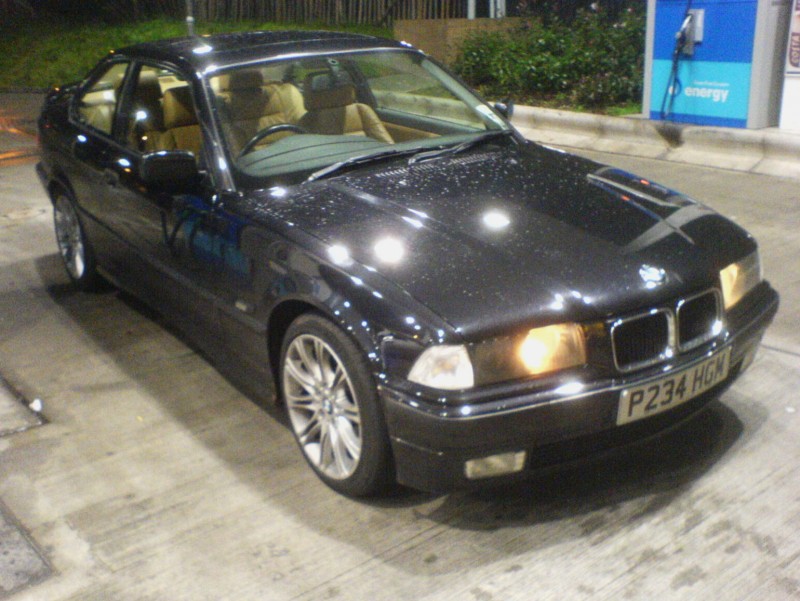
1996 Cosmos 328i E36. Black Leather. M-Tech kit.
Image

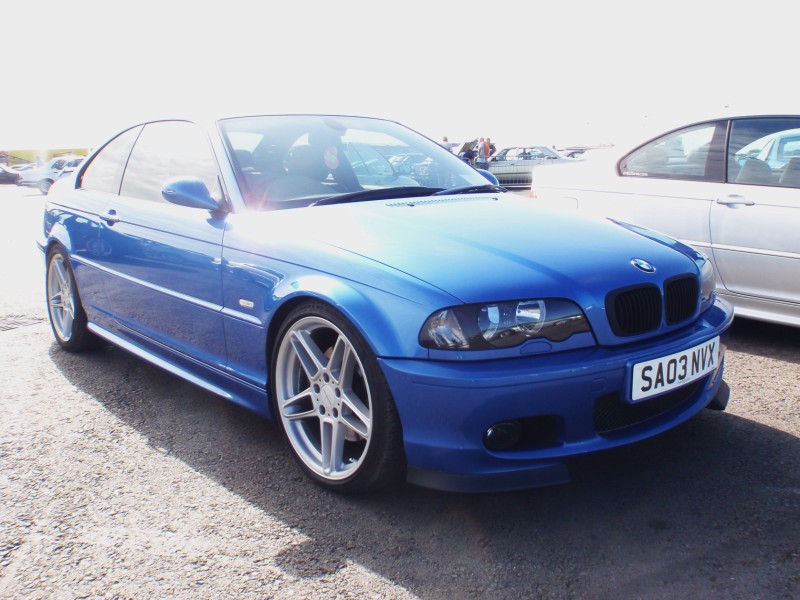
2003 Estoril 330ci Clubsport.
Image


Now...
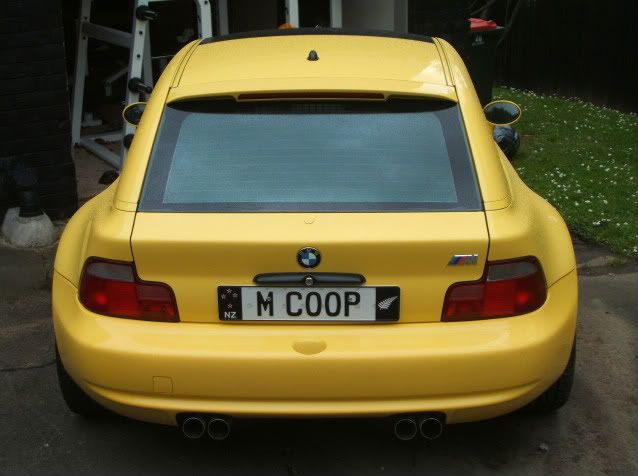
2000 Dakar II Z3 M Coupe
Image


The Z3 M Coupe
Well... Here is where I am now.

Finally plucked up the balls to sell my beloved Clubsport, after managing to find both a buyer and at the same time 'The One' to chop it in for.

It's a 2000 (S50 facelift) in Dakar II, with full black interior and only 32k. FSH, pretty much mint, and with some tasty options.

I discovered it tucked away fairly local to me at prestige/race car trader Duncan Hamilton, after finding it mistakenly paced in Autotrader under Z3, rather than M Coupe. The Z3M Coupe forum boys are mad-hot on exactly what's available on the market at any one time, and so the good one get snapped up very quickly as everyone in the market looks at said forums. The car looked perfect (condition and spec wise), so I knew I had to act quick.

Nearly had a heart attack when another forum member on E36coupe.com posted up a link to the car in the middle of my negotiations :shock: ! He kindly removed the link after a quick PM - I was bricking it that someone else might outbid me, as I had negotiated a rather aggressive discount, knowing the owner wanted to sell; blissfully unaware that most of his potential buyers would never even see it, as it was advertised in the wrong place.

Well a deal was struck for a very fair price (it was advertised for £16995 - I paid nowhere near that) considering condition, mileage and the fact it comes with a 1year warranty. Bonus. :D

Well, the 330 Clubsport went to the new owner on a Friday night, without the girlfriend or my Parents knowing. This was just because I couldn't be bothered with the inevitable 'What? You must be bloody joking the amount of time you spent on that car blah blah blah' . My girlfriend love the 330 and I knew she'd be pi55ed off if I told her it was going.

Well part of my plan ran smoothly. My girlfriend literally lives 5 doors down, and I was with her that night. I said that I had to go home quickly to get something, sold the car, and came back without her knowing a thing.

However, whilst at home, in the middle of filling in the V5, the folks came back from the pub to find me and two fellas sitting in the lounge exchanging. Cue much embarrassment as my rather loud and lathered-up old man starts going into shock. :lol:

So. Next morning, Girlfriend thinks I'm going to work. I come home a couple hours later in a 2 seater marigold. :lol:


Plan is to keep the car mostly OEM. No flash rims methinks, just original goodness with a twist. By that, I'm thinking lowered and uprated suspension, ARBs, polybushes, spacers and dechromed. And that's it. The rest will just be refreshing parts for new, tidying and maintenance.

Car needs some new rear pads in the next 2000 miles or so, and some new rear rubber - I have a pair of Conti's waiting to go on when the snow goes away. Bushings and what-not are all ok, so apart from the pads and brakes, nothing else critical is necessary, which is nice. I intend to work on this at a more leisurely pace than my last car... Which was bought, tidied, transformed and turned-around in under 8 months, sold on for a profit.

If I 'finish' this one too soon, will I get bored and buy something else? Well the S50 lump has draw a smile on my face so big since I got her home, boredom seems unlikely right now...


So It Starts - December 2009
I had a box of unfitted parts that I ordered before I'd even picked the car up. I had given it a thorough once over and test drive, so I had a mental log of what I needed to get. They are mostly under-bonnet refreshment bits, but that'll be posted up later.

Image


Some rain-x was applied (crazy sh1t to see when you are on the motorway and water is dripping up the windscreen), and some new Bosch wipers fitted.

Image


Big bottle of G101 ordered, which was used in door hinges and various other places, and will also be used to clean the arches before undersealing.

Image


Car had been clayed by Duncan Hamilton, so paint felt very nice indeed. However, it became evident when it rained that they had just used some kind of shitty quick-wax as beading was poor. As they saved me a job on the claying, wasted no time I getting stuck-in with the snowfoam and Collinite 476s - a marvellous product.

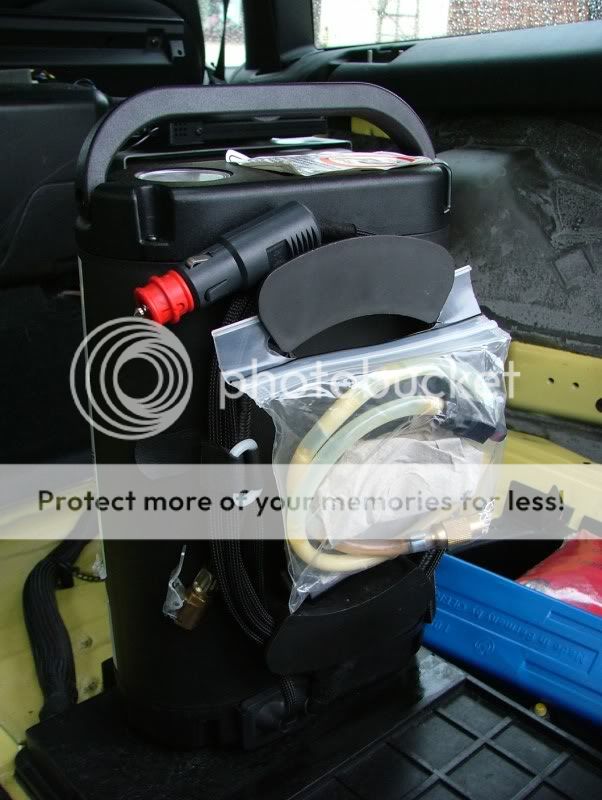
The Karcher, alongside the pressure washer :lol:

Image

Snowfoamed

Image

All finished, and after two layers of Collinite all over;

Image

Image

Image

Image

Image

Image

Image

Image

Image

Beading;

Image

Image


Finally, the essential application for this time of year; Gummi Pflege. Marvellous gear.

Image


Pleased with the results. The car could do with a quick mop, but I'll wait until meet-season next summer, and share the cost of a DA with my brother.

Did clean in all the hinges, boot shuts etc, but forgot to take pictures (if anyone other than the fellow OCDers even care).


Initial Impressions
Now I've had time to take in the driving experience of the car, I can't really describe the drive as anything other than an 'event'. You simply can't have a relaxing drive it it, due to the nature of the car - it's loud (engine noise, road noise, gearshifts and bumps are all presented quite obviously), and the driving position is so low down that you're prepped to drive it, rather than breeze along in it. If that makes any sense. As soon as engine oil is up to temp, you forget about the cost of fuel, and find opportunities to bury your foot. It's addictive... And the car makes most sense, perfect sense, right then. It's a lot of fun. You can't arrive at work (after the 5:30am drive in) feeling anything other than awake, especially if its tried to kill you on the frosty/wet roads in :lol: . Comparatively, I could drive the CS whilst still asleep... TC on, music playing.


Christmas '09/Early January 2010
Been a bit of a slow month, as I had to spend a proportionately ridiculous amount of money on the missus after treating myself to the Z :lol: , which meant the car fund has taken a back seat for a bit. Then it was a combination of Christmas, snowfall and illness that kept me from getting on with tidying the car up.

Inspection II + Vanos Gaskets Filter
Anyhow, before Christmas the car went into see my mech, Mike at A-L Tuning. I can't recommend the fella enough, he's an ex BMW mech, and its him that tunes all the CA Automotive cars, whacks great supercharges on them and writes his own maps. He also created that red 475bhp N/A E92 M3 after spending about year designing the map alone. Well you get the point - he knows his salt - so if your in the London Berkshire area - give him a shout.

My car went in with him for a 'proper' inspection II (valve clearances + 'box oil all-in), even though the car had been serviced just 800miles ago, for my own piece of mind. All the usual service items replaced along with the valve clearances checked and new 'box + diff oil, plus I had the vanos filter and gaskets replaced for new. Lovely.

Engine Bay Tart-Up (Pt.1)
When I bought the car, there was a few engine bay bits that needed addressing, but all superficial, including a little rust on the fuel and vacuum rails. That is still there (but will be sorted in course). However, The chromed trumpet nuts were tatty, as was the oil filter cap. So these were replaced with new items (at a cost of £3 each trumpet bolt), and I also purchased some Evo 'Vert strut tower caps, as I think these smarten up the bay;

Image
Image

There is some paint coming away from both the plenum and the rocker cover, although just cosmetic, these will be addressed at some point as I continue to tart her up.

Storm V2 Titanuim-Finish Weighted Gearknob
The missus treated me to one of Bilal's Titanium-finish Storm V2s for Christmas. Well, what can I say. The Z3M gearthrow is short anyway, and this is about an inch shorter. Coupled with the sheer weight of the thing and the new 'box oil, the shifts feel sublime. A lot more 'guts' to each shift now. Such a small item, yet such a significant change in feel. Love it.

Bloody cold in this weather though :lol:

Image


I think the titanium finish is perfectly suited to the car's interior;
Image

Image

Image


Door Card Leather Treatment
I removed the drivers door card to tidy up some small marks made on the leather, probably from the previous owner shutting the door with the keys still in their right hand. It was a good excuse to treat it to a full scuffmaster treatment.

The leather and plastic were shampooed, and then the individual marks were treated with the neat dye, applied with a cocktail stick. Once all of those were seen to, the entire leather elements were washed with 2 coats of 85/15 dye/water solution. Came up like new.

Before;
Image

After;
Image


The door card now looks lovely, and has a more matt finish to the leather, which I like. The passenger side was pretty much fine, so I Scuffmastered that in-situ, as it just required a quick shampoo, a single wash with some dye solution and then a condition.

The seats will be removed, and the leather centre console will also be receiving the same treatment soon too.


Mirror Base Refurbishment
The only parts of the bodywork that let the car down are both mirror bases, that have started to bubble badly. Looking at these on an otherwise mint car made me cringe, and I've been itching to do them. The corrosion is not the earthy-coloured ferrous corrosion, but the milky-white oxidation aluminium suffers, which requires a slightly different treatment.

For an in-depth pictorial guide to how I treated these, I did a DIY for the mirrors if you want to do the same;
///M Mirror Base DIY Refurbishment

Just a brief run down of images for the journal;

The worst side of the bubbling looked like this, and I can't describe how much of a splinter in my side this was;

Image


After sanding down with various levels of paper, I also sanded the rest of the clear coat to allow a better key;

Image


After priming, I sanded gently with 1200 grit wet and dry to a smooth finish, looking like this;
Image

Whilst all the mirrors were dismantled (along with a couple bits from the door), all the individual components were cleaned up with a G101 mixture and a combination of scrubbing and toothbrushes - they needed it after 10 years, but came up good;

Image

Also, whilst I was doing the mirrors, the motor wires were taped up and neatly stuck to the side of the car inside some clear plastic, as snow was forecast (and boy, did it come!). It's illegal to drive without a driver side mirror, but I bet I could shave a few seconds off a lap around the ring without them :lol:

Image

Image

Anyway, back to the mirrors themselves;

After a couple coats of paint

Image


After two coats of lacquer;

Image

You can see in the reflection that 'orange peel' appearance is minimal.

Image


I honestly think the finish is not far short of what a bodyshop could have achieved. Well chuffed.

All items were meticulously cleaned before remounting;

Image


And back on the car;

Image

Image

Image


Must say, Halfords did me proud on the colour match. It's identical.

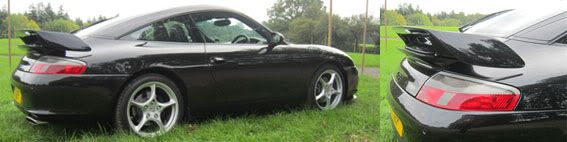
Got the confidence to do other small items now. I think I may go black grills and black side fins (IMO Dakar and Chrome are not the best partners). If I do, the only remaining chrome piece on the car will be the chrome boot handle. I've seen this in black before (you can actually order an OE black boot handle), but to me, in black it looks like a Hitler moustache on a Simpson's skin tone;

Image

Because i think ^^^that looks odd, I may well try and do the boot handle Dakar myself. We'll see.

Very kindly, I have been made an offer on some OE grills by another member on here, so once I get them, I will be sanding them and doing them black.


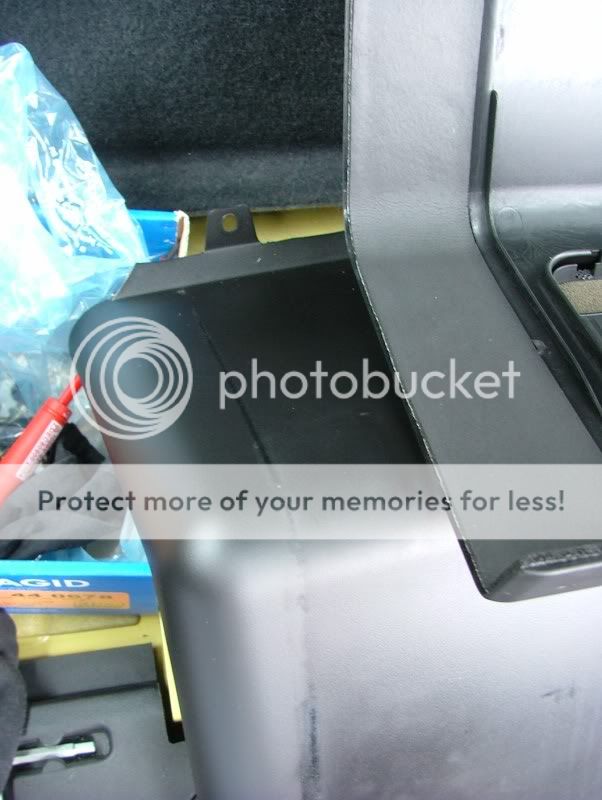
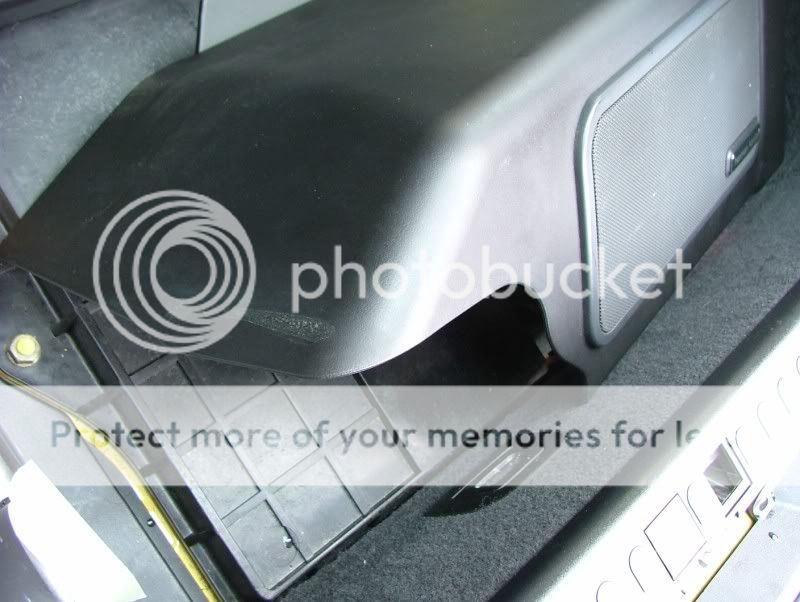
Fuel Cavity Blockage/Fuel Cap Not Flush
I had noticed after washing the car before that the fuel cap cavity would fill up with water and not drain away... Obviously a blockage, but I kept forgetting to see to it.

In the end I got some electrical multicore cable (flexible but strong), located what should have been the drainage hole and fed it inside. I then added a few drops washing up liquid, and poured in some boiling water. After a few bubbles, the lot disappeared - problem solved. The rest of the cavity including fuel cap itself was then given the obligatory scrub with some G101. That 5l bottle is paying for itself... :lol:

I then noticed that the fuel flap on the body was not sitting as flush as I'd like. This was annoying.

A few tugs outward on the shoulder it rests on when closed, and the cap now sits how it should. Or how I think it should at least. Satisfying.

Before;
Image

After;
Image


Mid January 2010
These all arrived in the post :D

Braided Clutch Hose, custom made by Earl's for the Z3Ms;
Image

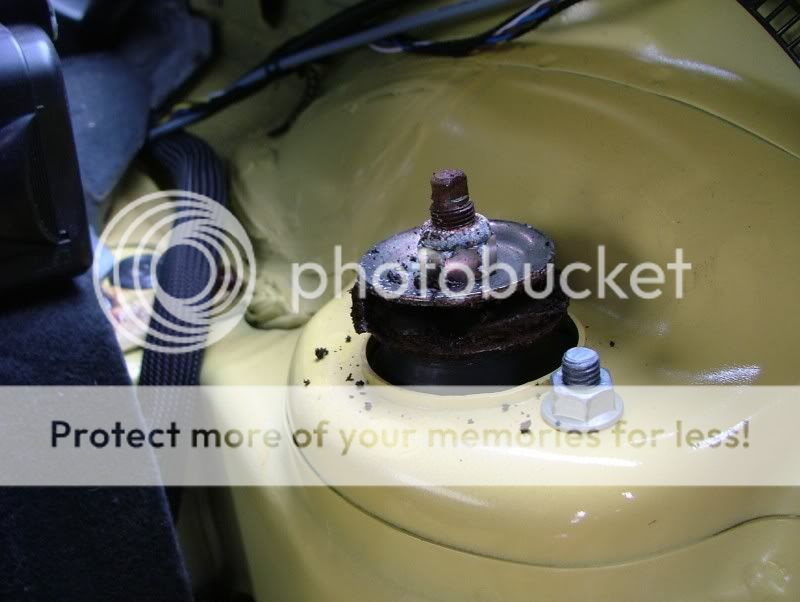
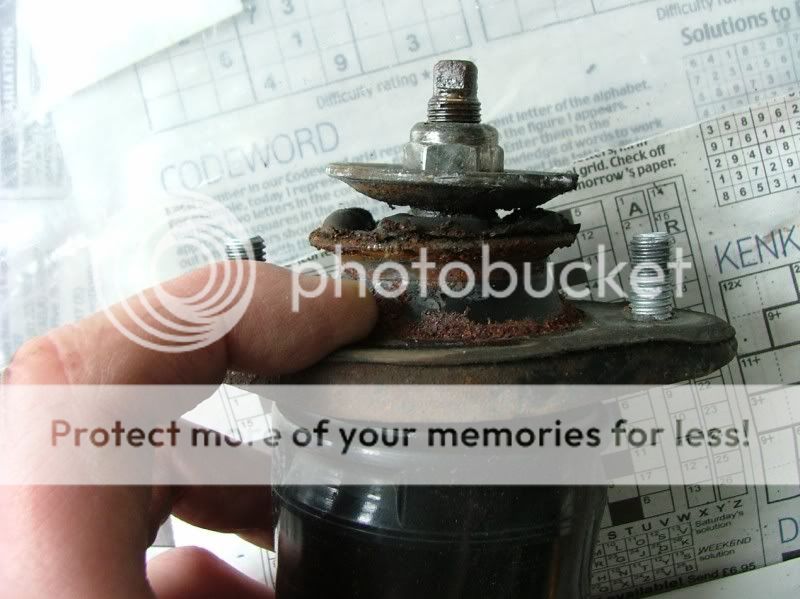
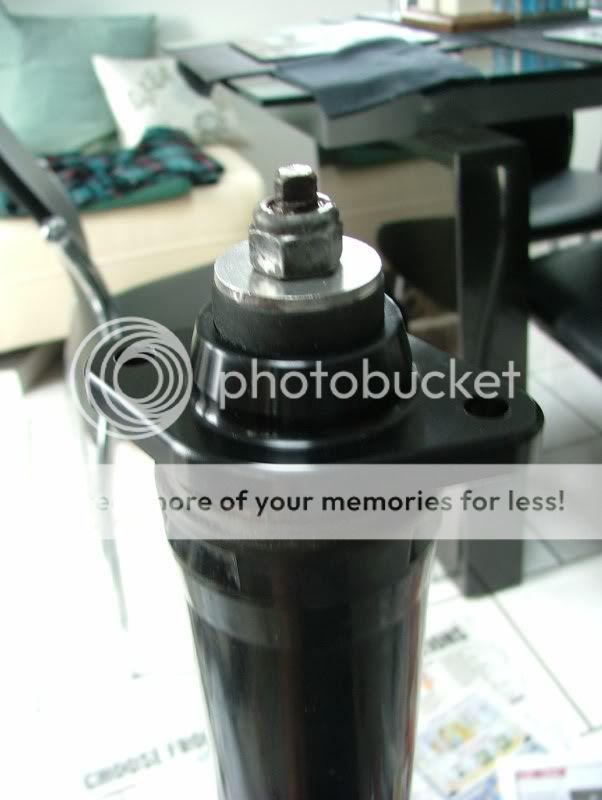
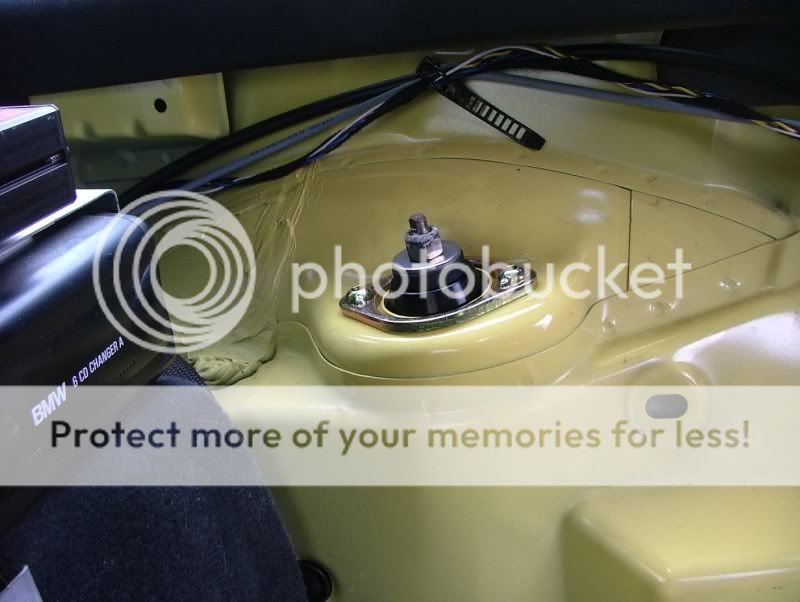
Rogue Engineering Top Mounts;
Image

These will be fitted myself in the next couple of weeks, so expect an update then.

Hope you have enjoyed reading so far (if you haven't fallen asleep yet) :D [/url]
Last edited by Keith on Sat 27 Mar, 2010 12:55, edited 3 times in total.
Image
2000 Z3M Coupe - Dakar II
^^^Click Image For Journal^^^
Mr Adds
Joined: Thu 12 Jul, 2007 12:34
Posts: 47

  Z3 roadster 2.2i
Location: Newcastle upon Tyne

Post by Mr Adds »

I love Dakar Yellow!

Very interesting write up, looking forward to more in the future!
User avatar
Jonttt
Z Register member
Joined: Sun 28 Dec, 2008 16:32
Posts: 6554

  M roadster S54
Location: Liverpool

Post by Jonttt »

Glad you started a journal Keith, looking forward to reading more.

ps you won't believe the difference the braided clutch hose makes :wink:
Happiness is not around the corner........happiness is the corner
Image Video or Journal Garage: 2015 FFRR Black Edition, Porsche Boxster GTS, 1997 Porsche Carrara C4S, Ex 2001 BMW S54 Z3m Roadster
User avatar
Keith
Joined: Sat 07 Nov, 2009 14:56
Posts: 85

  M coupe S50
Location: Maidenhead

Post by Keith »

Jonttt wrote:Glad you started a journal Keith, looking forward to reading more.

ps you won't believe the difference the braided clutch hose makes :wink:
Thank you Jonttt. Thought I'd better start one, as this forum really is a great resource of information and knowledge, so it's good to chip in and contribute.

Had a good look through yours the other day too, which is a nice read. It inspired me to order a new key fob actually!

RE the clutch line. New gearbox oil obviously goes some way to improving the feel, as does the weighted Storm knob. Seeing as both of those have just been done on mine, I'm expecting the braided hose to compliment these and the cumulative sum of the parts to add up to a very nice shift feel.

Like you have just confirmed, I've only heard good things about them, and seeing the car is entering its 10th year, the existing rubber item must be in need of a refresh...
Image
2000 Z3M Coupe - Dakar II
^^^Click Image For Journal^^^
User avatar
Keith
Joined: Sat 07 Nov, 2009 14:56
Posts: 85

  M coupe S50
Location: Maidenhead

Post by Keith »

Started fitting the top mounts (or rather removing the mountain of trim required to get to the top mounts).

Don't know if the roadster is the same, but there are 24 pieces of trim to be removed before you can even gain access to them on the coupe.

1.5 hours after starting the trim removal process, and I'm nearly there, ready to start again tomorrow.

Just look at the trim I've had to take out!

Image
Image
2000 Z3M Coupe - Dakar II
^^^Click Image For Journal^^^
User avatar
yalden
Joined: Sun 30 Mar, 2008 18:03
Posts: 1232

  Z3 roadster 3.0i
Location: Devon

Post by yalden »

Great work Keith,

The mirror base plates look excellent, I too am one for cleaning up all aspects of anything removed... it's good to see I'm not the only one!

With regard to the boot handle, I don't mind the blacked out look, but I think colour coded would be more up to date!

Am I right in saying that the rogue mounts can be removed from underneath? Meaning future replacement or access etc can be afforded without having to remove all the trim again?
User avatar
Keith
Joined: Sat 07 Nov, 2009 14:56
Posts: 85

  M coupe S50
Location: Maidenhead

Post by Keith »

yalden wrote:Great work Keith,

The mirror base plates look excellent, I too am one for cleaning up all aspects of anything removed... it's good to see I'm not the only one!

With regard to the boot handle, I don't mind the blacked out look, but I think colour coded would be more up to date!

Am I right in saying that the rogue mounts can be removed from underneath? Meaning future replacement or access etc can be afforded without having to remove all the trim again?
Thanks man. I'd be rude not to clean stuff that comes off eh?!

You are right about the Rogues - once they are all, all trim will be put back together nice and tight (with anti squeal tape where required on mating surfaces), and should not have to be removed again for a very long time...
Image
2000 Z3M Coupe - Dakar II
^^^Click Image For Journal^^^
User avatar
Jonttt
Z Register member
Joined: Sun 28 Dec, 2008 16:32
Posts: 6554

  M roadster S54
Location: Liverpool

Post by Jonttt »

Keith, I think you have removed the whole boot :shock: Nope not as bad on the roadster :D
Happiness is not around the corner........happiness is the corner
Image Video or Journal Garage: 2015 FFRR Black Edition, Porsche Boxster GTS, 1997 Porsche Carrara C4S, Ex 2001 BMW S54 Z3m Roadster
User avatar
Keith
Joined: Sat 07 Nov, 2009 14:56
Posts: 85

  M coupe S50
Location: Maidenhead

Post by Keith »

Jonttt wrote:Keith, I think you have removed the whole boot :shock: Nope not as bad on the roadster :D
Believe me - every single bit of that was necessary, and even then, I'm doing it the shortcut/fiddly way.

If you want clear-cut access to all the clips and trims, you should really remove about another 8 pieces... Crazy design. I assume it's because the boot of the Coupe was basically added on by the M division to the roadster's existing design. Not having the benefit of designing it from the ground up, meant the luxury of access wasn't really a consideration.
Image
2000 Z3M Coupe - Dakar II
^^^Click Image For Journal^^^
User avatar
yalden
Joined: Sun 30 Mar, 2008 18:03
Posts: 1232

  Z3 roadster 3.0i
Location: Devon

Post by yalden »

Keith wrote:anti squeal tape
Sounds useful... any info?
User avatar
Keith
Joined: Sat 07 Nov, 2009 14:56
Posts: 85

  M coupe S50
Location: Maidenhead

Post by Keith »

yalden wrote:
Keith wrote:anti squeal tape
Sounds useful... any info?
I robbed some from work. It is simply just self adhesive tape, about 50mm wide, and made of low-density rubber. You'll see in the write up below...
Image
2000 Z3M Coupe - Dakar II
^^^Click Image For Journal^^^
User avatar
Keith
Joined: Sat 07 Nov, 2009 14:56
Posts: 85

  M coupe S50
Location: Maidenhead

Post by Keith »

Finished fitting the Rogues - and what a process...

Before (please excuse some of the blurry shots);
Image

See a couple posts back for the mountain of trim that had to come out...

And finally stripped;
Image
Image
Image

Love this lovely little bit of OE kit - a compressor and sealant kit. I assume the roadsters have the same?
Image

Old mounts were in a bad way. They had perished enough to allow water in and start going pretty rotten, so I'm very glad I did this.
Image
Image

Rogues all fitted;
Image
Image


Now the reason for all this was two-fold. I hoped to kill two birds with one stone - uprating the top mounts and locate the source of a n/s/r squeak I had, which was really beginning to grate on me. Whilst the trim wash out, it was cleaned and I think I've identified a couple of likely culprits with regard to my squeak - spotting signs of wear on mating surfaces. These were treated to some anti-squeak tape.

Here you can see where the overlapping parts of the HK sub/changer trim had been rubbing on each other. Note the anti squeak tape on the opposing part to the right);
Image

More signs of rubbing;
Image


I have not had a chance to drive the car yet, but I will be using it tomorrow... Hopefully it'll be a squeak-free drive. :D

New clutch hose will be fitted next week, along with new fluids.

Thanks for looking

Keith
Last edited by Keith on Thu 14 Jan, 2010 20:17, edited 1 time in total.
Image
2000 Z3M Coupe - Dakar II
^^^Click Image For Journal^^^
User avatar
3.0 Lakes Lee
Joined: Wed 01 Apr, 2009 08:34
Posts: 258

  Z3 roadster 3.0i
Location: Kendal

Post by 3.0 Lakes Lee »

Brilliant and very interesting to read :thumb: How did you remove the mirror glass from the mirror housing, they are clicked in place at 4 points, curious as to how you did it without cracking them!................I speak from experience :head:

Lee
<a href="http://s185.photobucket.com/albums/x201 ... ooter2.jpg" target="_blank"><img src="http://i185.photobucket.com/albums/x201 ... ooter2.jpg" border="0" alt="Photobucket"></a>
MarkOliver
Joined: Wed 02 Jul, 2008 16:29
Posts: 239

  Z3 roadster 2.8
Location: Manchester

Post by MarkOliver »

Excellent work keith.....you are dead right about Colinite (very durable for winter as well )

I have just used 915....v impressed :)
User avatar
aceman
Joined: Sun 01 Jun, 2008 11:16
Posts: 1479

  M roadster S50
Location: Wakefield

Post by aceman »

Keith, the source of your squiking maybe one of your shocks as I had exactly the same problem early last year so I purchased some new OEM shock mounts thinking is was one of those but when I got it all apart I found the actual shock was the culprit so had a quick trip to Euro carparts for some Boge shocks which cured the squeek. Just compress the shocks against a hard surface whilst out of the car and you can hear them squeeking.

Excellent writeup bye the way and such a lovely car too, I look forward to reading your journal updates.
Aceman

Arctic Silver '98 Z3M

Previously;
Bright RED '99 Z3 2.8

Rocking seats ? You need seat bushes click HERE
User avatar
Ian_C
Joined: Sun 10 Dec, 2006 20:10
Posts: 2415

  Z3 roadster 2.8
Location: Lytham St Annes

Post by Ian_C »

Always good to see another journal, makes for interesting reading :thumb:

Keep up the good work Keith!
Current...1998 ///M Coupe
Image
Previously...1997 Z3 2.8
Image
Guest


Post by Guest »

excellent work! :D

I saw a Dakar Yellow Coupe on the M6 the other day, I guess it wasn't yourself??
User avatar
yalden
Joined: Sun 30 Mar, 2008 18:03
Posts: 1232

  Z3 roadster 3.0i
Location: Devon

Post by yalden »

3.0 Lakes Lee wrote:Brilliant and very interesting to read :thumb: How did you remove the mirror glass from the mirror housing, they are clicked in place at 4 points, curious as to how you did it without cracking them!................I speak from experience :head:

Lee
Good point... I had this issue when spraying the pair I bought off ebay... for the life of me I couldn't get them out without really going for it and the worry of cracking a glass meant I just masked them thoroughly.
User avatar
Keith
Joined: Sat 07 Nov, 2009 14:56
Posts: 85

  M coupe S50
Location: Maidenhead

Post by Keith »

@Violetduck - No, wasn't me! Rare site though - I believe there are only 6 UK supllied Dakar coupes...

RE: The mirror glass - if you look in my DIY (see knowledgebase) it explains it.

You have to press the top of the glass to its furthermost point, so that the bottom edge moves forward to the edge of the body. You can then get a small flathead underneath (tape it up for protection) and see where the bottom to clips are. Using the screwdriver you can quite easily pop these off.

Once the bottom two are off, you can get you hand in a wriggle the top too off. You need to be firm, but as long as you support the mirror glass itself, it can be done easily. :thumb:
Image
2000 Z3M Coupe - Dakar II
^^^Click Image For Journal^^^
Guest


Post by Guest »

cool! I think there were 13 M///roadsters

on the very same day I bought mine, I saw a Dakar roadster going in the opposite direction with a hardtop on! I couldn't see what it was though (i.e. M///, 2.8, etc).

Actually, does anyone know if Dakar was just an M/// colour? I think Estoril was wasn't it?
User avatar
stu
Joined: Fri 10 Oct, 2003 17:49
Posts: 3540

  Z3 roadster 2.8 supe
Location: On the edge!

Post by stu »

Keith wrote:@Violetduck - No, wasn't me! Rare site though - I believe there are only 6 UK supllied Dakar coupes...
There used to be one that lived in Beverley, East Yorks. Always a fan of these, but Black is my fave colour IMHO for an MCoupe.

I am quite tempted by the Pheonix Cat C one on PH at the moment though!
Last edited by stu on Fri 15 Jan, 2010 15:54, edited 1 time in total.
someone in a minority once wrote:I know I'm in a minority
Image
User avatar
yalden
Joined: Sun 30 Mar, 2008 18:03
Posts: 1232

  Z3 roadster 3.0i
Location: Devon

Post by yalden »

violetduck wrote:cool! I think there were 13 M///roadsters

on the very same day I bought mine, I saw a Dakar roadster going in the opposite direction with a hardtop on! I couldn't see what it was though (i.e. M///, 2.8, etc).

Actually, does anyone know if Dakar was just an M/// colour? I think Estoril was wasn't it?
IIRC Both Dakar and Estoril were offered as individual colours (or perhaps a regular choice on Sport models?) on facelift Non-M zed's; I've seen quite a few around my way
User avatar
Ian_C
Joined: Sun 10 Dec, 2006 20:10
Posts: 2415

  Z3 roadster 2.8
Location: Lytham St Annes

Post by Ian_C »

yalden wrote:
3.0 Lakes Lee wrote:Brilliant and very interesting to read :thumb: How did you remove the mirror glass from the mirror housing, they are clicked in place at 4 points, curious as to how you did it without cracking them!................I speak from experience :head:

Lee
Good point... I had this issue when spraying the pair I bought off ebay... for the life of me I couldn't get them out without really going for it and the worry of cracking a glass meant I just masked them thoroughly.
It's definitely do-able and once you've done 1 you'll have more confidence.

Lee - if we meet up in the Lakes in the Spring I'll demonstrate how to remove the glass.
Current...1998 ///M Coupe
Image
Previously...1997 Z3 2.8
Image
User avatar
3.0 Lakes Lee
Joined: Wed 01 Apr, 2009 08:34
Posts: 258

  Z3 roadster 3.0i
Location: Kendal

Post by 3.0 Lakes Lee »

myredzed wrote:
yalden wrote:
3.0 Lakes Lee wrote:Brilliant and very interesting to read :thumb: How did you remove the mirror glass from the mirror housing, they are clicked in place at 4 points, curious as to how you did it without cracking them!................I speak from experience :head:

Lee
Good point... I had this issue when spraying the pair I bought off ebay... for the life of me I couldn't get them out without really going for it and the worry of cracking a glass meant I just masked them thoroughly.
It's definitely do-able and once you've done 1 you'll have more confidence.

Lee - if we meet up in the Lakes in the Spring I'll demonstrate how to remove the glass.
All done and sorted, followed keiths guide, still tricky but doable, both mirrors now fitted without breakage!! :oops: thanks

Lee
<a href="http://s185.photobucket.com/albums/x201 ... ooter2.jpg" target="_blank"><img src="http://i185.photobucket.com/albums/x201 ... ooter2.jpg" border="0" alt="Photobucket"></a>
User avatar
Dolfan
Joined: Tue 09 Jun, 2009 12:19
Posts: 197

  M roadster S50
Location: Milton Keynes

Post by Dolfan »

Hi Keith, Interesting read and a lovely Coupe you have there 8-)
User avatar
Keith
Joined: Sat 07 Nov, 2009 14:56
Posts: 85

  M coupe S50
Location: Maidenhead

Post by Keith »

Glad the Guide helped Lee.

And Simon, I quite like that Pheonix one too - I've not doubt it's been properly sorted out. With genuine low miles the price is pretty good. Be awesome to track.
Dolfan wrote:Hi Keith, Interesting read and a lovely Coupe you have there 8-)
Thank you mate :thumb:
Image
2000 Z3M Coupe - Dakar II
^^^Click Image For Journal^^^
User avatar
Brian H
Joined: Tue 16 Dec, 2008 19:55
Posts: 2505

  Z3 roadster 3.0i

Post by Brian H »

Great Read Keith :thumb:

I have the same problem with my fuel filler cap not aligning on my roadster as I am missing the rubber stopper from the inside of the filler cap?

Item 6 on the diagram below?

Image

Is this also missing on yours?
User avatar
Keith
Joined: Sat 07 Nov, 2009 14:56
Posts: 85

  M coupe S50
Location: Maidenhead

Post by Keith »

Ardchyle wrote:I have the same problem with my fuel filler cap not aligning on my roadster as I am missing the rubber stopper from the inside of the filler cap?

Item 6 on the diagram...

Is this also missing on yours?
I can't actually remember. I'll have a look later...
Image
2000 Z3M Coupe - Dakar II
^^^Click Image For Journal^^^
User avatar
Keith
Joined: Sat 07 Nov, 2009 14:56
Posts: 85

  M coupe S50
Location: Maidenhead

Scuffmastered + Washer System Refresh

Post by Keith »

^^^Had a look and mine does not have the rubber fixing - but it has nowhere to fit one anyway? That picture above suggests there is a hole to pop a rubber piece into, but mine has no such hole?

Anyway...

Treated the car to an day out with my good friend Scuffmaster.

I won't bore you with the process unless anyone specifically wants me to describe it, but they came up exceptionally well IMO. A truly marvellous product, of which the pictures do the talking best.


Before;

Image


After;

Image

Image

Image


I also treated the centre dash/console/gear shift leathering to it as well, so along with the door cards I did before Christmas, the entire car has had its leather washed, shampooed, scuffmastered and conditioned. The cabin looks (and smells) great.

I haven't any pictures of the fresh centre console (I forgot) but I'll try get some pictures of that next time - but its literally come up as-new.


Next up I dealt with the rear wiper spray nozzle, which had not worked since I got the car. There are all kind of nightmare stories about sorting this, as the hose front the front washer bottle can pop off at a number of places along the length of the car, which can be right ballache to access. One common problem is for it to come off from a junction just inside the bulkhead, leaving you with a dry rear window and wet footwell, which I did not want to find.

I'd kind of prepared myself for a very fiddly job, but it was much easier than I thought. The motor pump was audible (so power/pump was good), there was no visible sign of windscreen wash coming out or dripping anywhere, and the footwell was dry. Upon checking the nozzle itself, it seemed mostly dry, but smelt of screenwash a little. After pulling off the hose that feeds it, I blipped the washer and fluid came flooding out. It was just a blocked nozzle all this time.

The nozzles were loosened with a pin, and then it was cleaned in a strong detergent and boiling water, from which a surprising amount of **** came out;

Image


This was then blown clean with an airduster, refitted and tested;

Image

Image


Worked for very the first time during my my ownership, nice!

As you can see above, notice the 'Duncan Hamilton' dealer sticker in the rear window. Although a 'prestige' motor dealer, it has been pi55ing me off for ages and has no place on my car. So whilst there it was simply lifted at one corner with a scalpel, removed and residue cleaned with some goo-gone. Rear end looks much tidier now IMO;

Image


I then went to fill up the washer bottle (it had not needed replenishing before since I bought it), and was appalled at what I found;

Image


Previous owners (longest owner was the original lady who bought it) must have filled up there washer fluid with hard water. A 10 year old mineral sludge was remaining, blue from the anitfreeze, and was clogging up my washer bottle. Disgusting. This was whipped off for some treatment.

Soaked with some G101 and then pressure washed;

Image


Then the outside scrubbed;

Image


A tatty old hose clip on the headlight wash pump was replaced with a lovely little jubilee clip that i had, taken from a selection I had acquired from work last year (knew they would come in handy some time :D );

Image


The pre-pump filter was scrubbed clean (this looked like it had been living at the bottom of the ocean beforehand - stringy sludge was hanging from it);

Image


The area of the engine bay that was revealed during removal was of course treated to a G101 bath (if you are wondering, the foil in the bottom corner is there to protect an electrical plug);

Image


And all back together, just before dark, and filled up with antifreeze screen wash and soft water;

Image

Image


Washer bottle came up nice and clean after a good scrub, so its another little part of the engine bay that has had a little refresh. I will order a new washer cap, as the old item has turned a little yellow (and brittle) with age.

Best part however, was the unexpected benefit that doing the above offered. After the filter element below the pump was cleaned free of all the sludge, the nozzle pressure rose dramatically! It must have only been working at about 50% pressure before (which I thought was normal)... Now the windscreen jets are much more powerful, so a very satisfying outcome overall.

As always, thanks for looking.
Image
2000 Z3M Coupe - Dakar II
^^^Click Image For Journal^^^
User avatar
3.0 Lakes Lee
Joined: Wed 01 Apr, 2009 08:34
Posts: 258

  Z3 roadster 3.0i
Location: Kendal

Post by 3.0 Lakes Lee »

Brilliant job, its the attention to detail that makes a car, and yours is getting better by the day, just love your breadvan :thumb: :lol:

Lee
<a href="http://s185.photobucket.com/albums/x201 ... ooter2.jpg" target="_blank"><img src="http://i185.photobucket.com/albums/x201 ... ooter2.jpg" border="0" alt="Photobucket"></a>
User avatar
Jonttt
Z Register member
Joined: Sun 28 Dec, 2008 16:32
Posts: 6554

  M roadster S54
Location: Liverpool

Post by Jonttt »

Nice one Keith :wink:
Happiness is not around the corner........happiness is the corner
Image Video or Journal Garage: 2015 FFRR Black Edition, Porsche Boxster GTS, 1997 Porsche Carrara C4S, Ex 2001 BMW S54 Z3m Roadster
User avatar
Ian_C
Joined: Sun 10 Dec, 2006 20:10
Posts: 2415

  Z3 roadster 2.8
Location: Lytham St Annes

Post by Ian_C »

Top job as always Keith, thanks for sharing :thumb:
Current...1998 ///M Coupe
Image
Previously...1997 Z3 2.8
Image
User avatar
Keith
Joined: Sat 07 Nov, 2009 14:56
Posts: 85

  M coupe S50
Location: Maidenhead

Post by Keith »

Thanks guys.

Just went to my local dealer to get a new washer bottle cover to replace the original which over the years has gone a bit yellow. Turns out they have stopped production of the old style one we have on our cars. I had to get the replacement part, which is nice, but I had to cut a clip off the back of it with a scalpel to make it suitable. It sits nice and tight, so it'll do over the old item.

CLICKY for old one.

New item;

Image
Image
2000 Z3M Coupe - Dakar II
^^^Click Image For Journal^^^
User avatar
Titan
Joined: Fri 01 Apr, 2005 20:20
Posts: 4002

  Z3 roadster 2.2i
Location: North Yorkshire

Post by Titan »

Nice work Keith, your coupe certainly looks very impressive :)

Reading the journal I thought - wow! - what a fantastic garage - just before I realised the seat is actually in the kitchen....... :head:

Two questions:
1 Have you had any problems with the Scuffmaster rubbing off and marking clothing?
2 Where did you source the 5litre G101?
Image :devil:
User avatar
PERRIN Z3M
Joined: Fri 12 Oct, 2007 19:49
Posts: 398

  M roadster S50
Location: Horley

Post by PERRIN Z3M »

Nice write up Keith as always very interesting.

What is G101 ?

steve
Image
User avatar
Keith
Joined: Sat 07 Nov, 2009 14:56
Posts: 85

  M coupe S50
Location: Maidenhead

Post by Keith »

Nice one guys.

To answer you question, the dye does not rub off at all. It dries like a top coat of the original leather finish.

G101 is an all purpose cleaner - a strong detergent which is safe but also acts very well as a degreaser if used in strong solution. Detailers use a 10% solution to clean all the trim and nooks on the car. Marvellous stuff for all manner of cleaning. You can get it from you local autosmart rep - google the company, call them give them your postcode and they will give the mobile number of you local man. Call him up, order some and he will drop it to your door. Only cost £15 for 5 litres, which will last you ages.
Image
2000 Z3M Coupe - Dakar II
^^^Click Image For Journal^^^
User avatar
Keith
Joined: Sat 07 Nov, 2009 14:56
Posts: 85

  M coupe S50
Location: Maidenhead

Post by Keith »

Bits and Bobs.
Haven't updated in a while, but little bits are always being done.

Recently just put two new rear ContiSports Contacts on the back - great tyre, and handle the wet weather we've been having a lot of very well indeed. Car still had the original rear tyres on! 10 year old rubber in the shape of PS2s... Still had 3mm of tread left too.

Also treated the car to some new OE Textar pads as it was on the original rear pads too (wear sensor had not come on either :? );

Image


You all know what new pads look like so I won't post a photo up. But I will post a pic up of the M calliper (the novelty of ///M ownership still hasn't worn off) :lol:

Image


These will be treated to some black paint soon, and have the ///M detail painted Dakar methinks.


Clutch Hose
To finish my transmission refresh, a braided clutch hose was added along with fresh fluid. I had already had new 'box oil and a titanium Storm V2 to compliment the short shift, so this was the logical next step. A bespoke item was made up by Earl's hoses to match the unique Z3M hose;

Old;
Image

New;
Image


I had read good things, but this is the best mod I've done for the money - no question. Incredible. Feel is improved between shifts to such a degree; less resistance slotting into gears is felt, no doubt because the clutch is actually being depressed 100% without losses afforded by the expansion of the old rubber item. When the car and fluids are hot after long drives, fast shifts can actually be a bit cumbersome due to the resistance. Now that resistance is reduced dramatically, when quick shifts are required (such as when heel-and-toeing) it's a doddle. Gear stick feels so chuckable now... It's really improved the feel. A must do mod IMO.


Black Grills
Now I know this will divide opinion as some are mad for keeping the iconing BMW kidneys Chrome. Pah. Chrome I am not a big fan of at all to be honest, especially on yellow. Black and yellow is just so 'right'.

Anyway the job is only half done with the kidneys; the side chrome grills will be done too, purely because chrome and Dakar are not the best partners. As a complete de-chrome look, I know this works very well with my car. See here;

Image

That is the aim ultimately. I am trying to source a spare set of side grills, as I want everything reversible (black kidneys were done on an extra OEM set I picked up), but the trouble is they are so expensive.

Anyway, I am now quite a good sprayer (sort of), after various painting jobs and most recently the mirror bases that I did a DIY for.


Anyway, prepping the OEM spare set to paint;

left is untouched, right is sanded for primer;
Image

Finished in satin, after 2 x black primer and 2 x paint, wet and dried between each (excuse blurry iPhone shot);

Image


Only pic I have right now with them on... Whilst jacked up getting tyres put on (I know about the alignment in the front wing/bumper - this only because its jacked up real high and twists a little, compounded by the fact my bumper needs re-aligning anyway... :wink: )

Image


New Stuff - I love bags of parts :D

Image

Image

Image

Image

Image


Above is various bits of trim to refresh, a new bumper lower mesh grill, a new marker light (old item had a stone chip on), which cost a fortune for such a small part (£27), and a brand new OE fire extinguisher - a retrofit I have carried out in all of my previous BMWs. It's just such a lovely little bit of kit. 8-)

I just need the missus to stop booking weekends away when I'm on my days off, so I can get bits fitted and crack on with some machine polishing!

The polisher is a DAS-6 and come higly recommended on the detailing forums. I bought a package with various Menzerna compounds and Sonus pads - this combination is meant to work very well with BMWs hard paint.


The new struts you see in the picture are my favourite bit though :D

The M Coupe boot is a hatch obviously... And it weighs a ton. The frame, glass, wiper mechanism and motor all add up, and the motor is placed at the further most point out (when open), so even a gust of wind can shut the boot whilst your in it. This is not helped by the fact the boot pistons are notoriosly poor.

Some of the M Coupe guys tried to solve this with brand new OE BMW struts, but found even new items to be still quite poor for purpose and were dissappointed.

I got in contact with a company called SGS who agreed to make up some bespoke struts. The OEMs are gassed to 280n of pressure, so I requested they gas them to 320n for some extra beef. The fella recommended an extra ten percent... but I suggested he pump them up to 320 just to be sure. :D

After fitting them, I was pleased to find that the pressure is spot on. The boot lid will now open easily, close without banging (which it always would do), and they are strong enough to allow you to leave the boot at any interim height and it will stay there. Well chuffed.

Very cost effective too; the OEM struts cost £55 for a pair, and these custom items cost £43 delivered. I really am so pleased with them - much to bewilderment of anyone I tell. Why does no one share my enthusiasm?! :lol:

Thanks for reading.

Keith
Image
2000 Z3M Coupe - Dakar II
^^^Click Image For Journal^^^
User avatar
Keith
Joined: Sat 07 Nov, 2009 14:56
Posts: 85

  M coupe S50
Location: Maidenhead

Post by Keith »

Another niggle sorted :D

My rear heated screen had not been working since I bought it. Fuse checked out and after testing the terminals with a multimeter it seemed it was an open circuit - switch or wiring.

Switch seemed unlikely as the illumination was still working and it all looked good, so I checked the wiring loom that exits the body and goes into the boot lid.

Peeling back the flexible rubber trunking revealed this;

Image


Bingo!

A trip to Halfords for some suitable cable, crimps and heatshrink (not at work for the next couple days, else the materials would have been acquired from there, rather than lining Halfords' tills :x ) and I was prepped for some crimping and soldering.

Image


I wasn't sure how to tackle it best, as there was precious little extra cable to play with, and the wiring was very tight at best. I could either cut all the cables and lengthen them with additional wiring, which could then be pushed inside the body, or I could just address the culprits only, although this would be tight and fiddly due to having next to no slack. :?

In the end, I decided crimping is just not physically possible on all wires as it would have been way to bulky. The more I looked, I realised even using solder and heatshrink on 10-odd cables would still have been too bulky to feed back in. So I chose to use crimps (strongest option too) on the two broken cables. I still had to add additional wiring, only because without there was not enough slack or space to get the crimping tool on the existing two halves of the wires. This additional wiring was then fed inside the bootlid, with just enough space.

Please excuse the poor pics, I only remembered to take a snap after I had tucked it all back in...

Image

It was a really fiddly and awkward job with so little slack to work with; I'm grateful there were only two broken wires... Any more and space would have become very tight indeed.

Anyway, first try... Condensation started to clear immediately. Immense satisfaction. :D

Afterwards, boot hinges were cleaned, all boot area paintwork was polished up, and black trim treated to trim shine. Looked brand new by the end :B

Then literally as finished tidying up, it chucked it down... :rolleyes:
Image
2000 Z3M Coupe - Dakar II
^^^Click Image For Journal^^^
User avatar
Keith
Joined: Sat 07 Nov, 2009 14:56
Posts: 85

  M coupe S50
Location: Maidenhead

Post by Keith »

Replaced the bumper lower mesh grill as my old item had a few cracks - one of those things I missed on the initial viewing.

Fitting required removal of a number of undertray items, plus a piece of plastic trim that directs the air from the intake grill to the oil cooler. Took a couple of hours, including removing a number of very annoying push-on trim-clip washer-thingies that are not meant to be removed after being pressed on. I asked about removing such HERE, and go on to describe how I managed it in the end, if anyone need to do similar.

No before photo's, but I'm really glad it's done now; once i had noticed, it was a real thorn in my side;

Excuse the recent low-res pics - all taken on the iPhone as my camera had packed in
Image


Whilst there I had chance to fit the other thorn in my side - A new side marker light (all £25 quids worth just for that little piece of plastic). Popped out, surrounding area polished and a new coat of Collinite;

Before;
Image

After;
Image


Much better :D


Next day I opened the boot to find the Harmon Kardon sub mesh had been knocked off (had lots of stuff in the boot the other day).

Perfect opportunity to unclip and remove the mesh, give it a clean, mask up the HK badge and give it a spray of matt black 8-)

Before, with a couple marks.
Image

After
Image


I also loosened all the front bumper fixings and realigned it, as it was not flush on one side (you can see it in the photo where its jacked up in the tyre place previously). This has now been rectified.

And just for the sake of it... Took this photo the other day - excuse the bad iPhone quality - which shows off the odd front end curves quite well 8-)

Taken before I adjusted the bumper though
Image


Finally, a couple small bits from my bag of goodies that I finally got around to fitting; as for once, it was a lovely sunny day out.

I've retrofitted an OEM fire extinguisher to all my previous BMWs that did not them. For me, it's up there with the coolest bits of OEM kit to have in the cabin. I love 'em.

It took me a while to work out how to get it fitted. It was much more difficult that the E46, which just required holes to be tapped. This required the seat out, leather covering unclipped, holes marked and drilled, followed by contortionist finger skills just to place bolts inside the seat (under the foam) and out the drilled holes I'd just made. Anyhow. Success was sweet.

I did a DIY for anyone that wishes to do the same HERE.

Leather covering unclipped at the front and pulled back, ready for holes to be drilled;

Image

Holes drilled, bolts placed inside, out through the material covering, bracket on and nuts tightened;

Image

Strap mounted (excess bolt length will be cut off once I dig out the Dremel :wink: );

Image

All Mounted;

Image

Image


Can't tell you how much I love catching a glimpse of that red when I get in :D . Fit is snug, and mounted with the OEM bracket exactly as it would have been from factory. IMO it really contributes to the quite basic but 'focused' cabin.

Thanks for reading.

Keith
Image
2000 Z3M Coupe - Dakar II
^^^Click Image For Journal^^^
aj2007
Joined: Wed 01 Aug, 2007 18:22
Posts: 435

  M roadster S50
Location: Newcastle-under-Lyme, Staffs

Post by aj2007 »

Hi Keith
Fantastic journal, I love watching your progress and superb attention to detail.
I have a question, could you please give me some guidance on front bumper alignment as my left hand side is further back than the right?
What do I need to undo to make the adjustments?
:?
Cheers
Ade
Image
User avatar
Keith
Joined: Sat 07 Nov, 2009 14:56
Posts: 85

  M coupe S50
Location: Maidenhead

Post by Keith »

Hi Ade, thanks for the kind comment.

For bumper adjustment, see my post HERE. :thumb:

That explains both the forward/backward and up/down adjustment

You may need to buy a special Torx T50 socket (Halfords do them for about £3.80) to fit your 3/8 ratchet, and you will need at least 10" of extension; I just put the short extension on top of the long extension and that was just enough.

Hope that helps mate.
Image
2000 Z3M Coupe - Dakar II
^^^Click Image For Journal^^^
aj2007
Joined: Wed 01 Aug, 2007 18:22
Posts: 435

  M roadster S50
Location: Newcastle-under-Lyme, Staffs

Post by aj2007 »

Thanks Keith, your a star, I will give it a go tomorrow :thumb:

Ade
Image
User avatar
Keith
Joined: Sat 07 Nov, 2009 14:56
Posts: 85

  M coupe S50
Location: Maidenhead

Post by Keith »

Update 27/03/10

I'll start with the small and boring bits.

The hooking points in the boot used to annoy the hell out of me - they were a bit chipped and tatty - so these were removed, degreased and sprayed with matt black.

Before;
Image

After;
Image


Next up, the quad pipes were treated to some Autosol, and came up an absolute treat, using just a rag and some elbow grease;
Image


Lovely.


Retrimmed Wheel
Every time I drive my brothers 130, I hanker, badly, for a fatter steering wheel. The E36 generation ones have always seemed a bit puny. The new generation wheels on the stock 1 and 3 series are perfect in my opinion; fat and with perforated sides. See here. I even thought about buying one and fitting it.

A better option though was to get an OEM E36/Z3 sport wheel retrimmed. I got in touch with a man who can, and told him what I wanted; extra padding, perforated sides, tri-colur stiching... No problem I was told. Same day I bought a wheel off an e36coupe.com member, who kindly posted the wheel directly to the retrimmer. 3 weeks later, this arrived; :D

Image

Image


I am chuffed to bits - the stitching is so vibrant, the leather exactly as new OEM nappa is, and the padding makes it aesthetically appear smaller and chunkier.

My existing tri-colour wheel, which was in excellent condition, is on it's way to another member on here, who will no doubt fit it to his minter soon. :wink:

Before I fitted the wheel, I broke it down into its component parts and gave it a good clean up with APC and then some solvent cleaner on the plastics to bring them up looking fresh.

For comparisons sake, here is the old item, and the new...

Fitted:
Image

Image


Took it for a drive (after washing my hands of course :lol: ), and can honestly say the extra chunkiness really adds to the feel of the steering somehow. I'd go as far to say that along with the Storm knob, the way you (I) interact with the car is much nicer, and both have proven to be excellent mods that contribute to the drive, every time I get in. Lovely.

The cabin as it now looks with both the Storm and the new wheel - complete, I would say:
Image


Thanks for looking.

Keith
Image
2000 Z3M Coupe - Dakar II
^^^Click Image For Journal^^^
User avatar
Ian_C
Joined: Sun 10 Dec, 2006 20:10
Posts: 2415

  Z3 roadster 2.8
Location: Lytham St Annes

Post by Ian_C »

The steering wheel transformation is a revelation Keith. You've got me wondering as to whether to go your route or whether to go for a Raid aftermarket wheel now. Decisions, decisions....
Current...1998 ///M Coupe
Image
Previously...1997 Z3 2.8
Image
User avatar
aceman
Joined: Sun 01 Jun, 2008 11:16
Posts: 1479

  M roadster S50
Location: Wakefield

Post by aceman »

That looks fantastic Keith do you mind me asking how much it cost to recover and who the craftsman is, I can see a few people on here wanting to do something similar including me.
Aceman

Arctic Silver '98 Z3M

Previously;
Bright RED '99 Z3 2.8

Rocking seats ? You need seat bushes click HERE
User avatar
Jonttt
Z Register member
Joined: Sun 28 Dec, 2008 16:32
Posts: 6554

  M roadster S54
Location: Liverpool

Post by Jonttt »

Keith, great improvement. As you say the extra thickness of the rim really does feel so much better and relaxing to hold than the rather too thin stock wheel and I would second your recommendation to anyone wishing to do this, it really is worthwhile :thumb:

Of course changing the diameter as well with the Raid wheel also changes the perceived "handling" of the car (ie steering feels much more direct and responsive). However, fitting an aftermarket wheel is not for everyone and this seems a great option for people.

MyRedZed, your more than welcome to have a drive with my Raid wheel (eg I'll be at the Dales run early for breakfast :D ). I guarantee you will want the thicker wheel but you can then see if you want a smaller diameter or not :wink:
Happiness is not around the corner........happiness is the corner
Image Video or Journal Garage: 2015 FFRR Black Edition, Porsche Boxster GTS, 1997 Porsche Carrara C4S, Ex 2001 BMW S54 Z3m Roadster
User avatar
Jonttt
Z Register member
Joined: Sun 28 Dec, 2008 16:32
Posts: 6554

  M roadster S54
Location: Liverpool

Post by Jonttt »

Keith, have you thought about some aftermarket pedals ? I think the right ones would finish off the interior nicely ?

Personally I've had both Hamann (first ///M) and Ac Schnitzer (current ///M). As much I like all things Schnitzer I preferred the Hamann ones :wink:
Happiness is not around the corner........happiness is the corner
Image Video or Journal Garage: 2015 FFRR Black Edition, Porsche Boxster GTS, 1997 Porsche Carrara C4S, Ex 2001 BMW S54 Z3m Roadster
User avatar
yalden
Joined: Sun 30 Mar, 2008 18:03
Posts: 1232

  Z3 roadster 3.0i
Location: Devon

Post by yalden »

Keith,

More excellent work... well done chap!

I'm guessing Jon did your wheel? I'll be checking out Woody's at tomorrows Exeter meet as I'm in need of mine doing! I love the perforated leather on the grip, I might steal that idea from you :oops:

Those tips look awfully good for nothing more than autosol and elbow grease, great effort! 8-)
User avatar
Giles
Joined: Fri 10 Oct, 2003 17:51
Posts: 2287

  Not specified

Post by Giles »

Brilliant thread.

Well done 8-)
User avatar
Keith
Joined: Sat 07 Nov, 2009 14:56
Posts: 85

  M coupe S50
Location: Maidenhead

Post by Keith »

Thanks for the comments folks - I've just comeback from a weekend away and can report the steering wheel was a jot to behold! Only problem is that I now feel obliged to wash my hands before I drive anywhere! :lol:

I've PM'd all those who were after details. :thumb:
yalden wrote:Keith,

More excellent work... well done chap!

I'm guessing Jon did your wheel? I'll be checking out Woody's at tomorrows Exeter meet as I'm in need of mine doing! I love the perforated leather on the grip, I might steal that idea from you :oops:

Those tips look awfully good for nothing more than autosol and elbow grease, great effort! 8-)
Cheers Chris,

No it wasn't John. I used a guy based in Oxfordshire. I'll PM you over the details too mate.

Thanks again for looking all.
Image
2000 Z3M Coupe - Dakar II
^^^Click Image For Journal^^^
Post Reply